Recently, large hexagon tiles have been gaining a lot of popularity because of their unique and trendy look.
For this reason, you may be thinking to install hexagon tiles on a floor in your house or on a different project.
But even if you already have some experience installing tile, hexagon tiles have a few differences that could trip you up and make the installation challenging, so you may be wondering:

How do I install hexagon tiles on a floor?
In this article, I’ll show you the easiest and most efficient way to layout your floor and install those large hexagon tiles.
I'll also share some tips and tricks that will make your project easier and quicker!
Firstly, I'm going to assume that you already know the basic steps involved in prepping and tiling a floor, but if you don't, don't fear!
You can check out my Ultimate Guide To Installing A Tile Floor, which will get you up to speed and ready to take on your project!
- 1Tile size. There are quite a few sizes of hexagon tiles available, with more coming. I recommend that you choose one that is between 6" and 10" in size. If you go smaller, they will likely be on sheets, which will change this process and add a few other challenges. On the other hand, if you go bigger, there will be some extra difficulties relating to the subfloor and the method that you install.
- 2Grout joint size. Hexagon tiles are typically made to less stringent specifications than square and rectangular tiles and this means that they are often not very consistently sized. For this reason, if you choose to go with a small grout joint (ie. 1/16" or 1/8"), you will very likely have HUGE struggles getting your grout lines consistent. My recommend is to install with a 3/16" grout joint size, but if you feel confident in your abilities, you could go down to a 1/8".
- 3Pattern/Design. Some hexagon tiles are designed to be installed in any direction and others to be installed in a pattern. If you are very comfortable installing tile, feel free to tackle a pattern, but if you don't have any/much experience, I would highly recommend choosing a tile without a distinct design. I say this because hexagon design patterns can be VERY challenging (because you're dealing with 6 sides to the tile as opposed to a typical 4-sided tile).
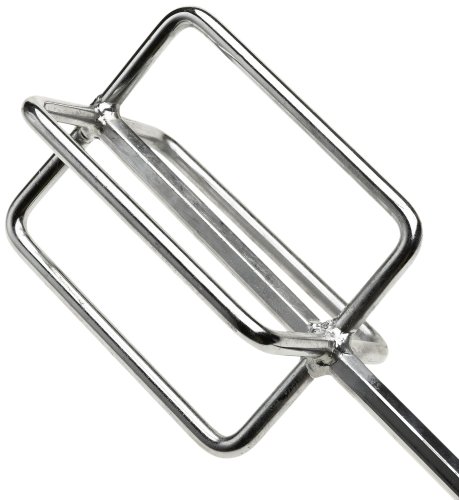
Recommended spacer for hexagons:

uxcell Wall Floor Tile Plastic Y Type Spacers Tiling Tools 3mm White 1000pcs
$16.49 ($0.02 / Count)
Total Size: 18.5 x 16.5 x 3mm / 0.73" x 0.65" x 0.12"(L*W*H); Package Content: 1000(+/-2%)pcs x Tile Spacer
Weight: 257g; Product Name: Tile Spacer
Material: Plastic; Suitable for Tile Gap: 3mm / 0.12"
Fit for Hexagonal Brick
Main Color: White
Update (2/20/2024): Although I do still enjoy and use the Smart Spacer (mentioned below), it has become INCREDIBLY difficult to get hold of! So, recently, I've been using Y-spacers that are designed for installing hexagons (the link above). These work very well - my only wish is that they were available in 3/16" sizes as well as 1/8".
I VERY highly recommend using the Smart Spacer for installing hexagons.
It will allow you to install the tile with 1/16", 1/8", or 3/16" joint sizes, use them in place of wedges if you need to, and won't compress!
And if you'd like to check out my in-depth review of the Smart Spacer, you can do that here.
Now, let’s get to installing
these large hexagon tiles!

Tools
Most of the tools that you'll use are the same as installing any other tile.
But here are a couple of extra tools that are especially helpful with installing these large hexagon tiles:
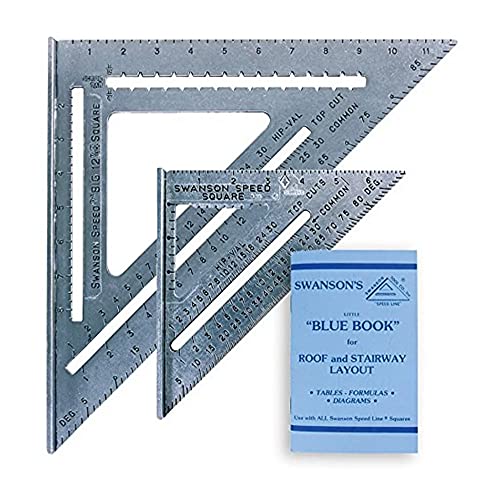
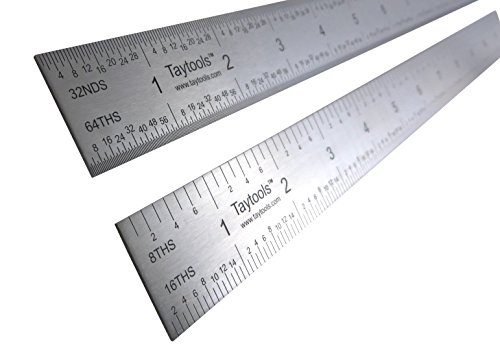
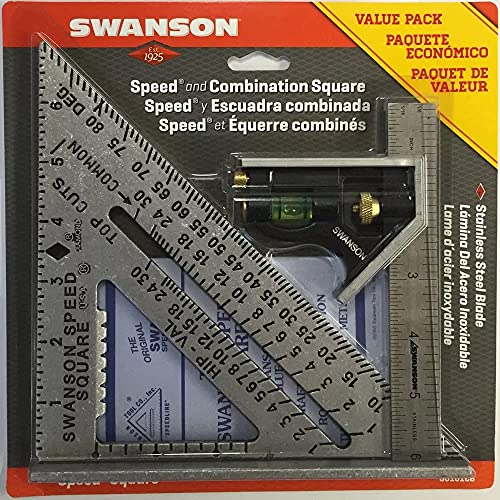
- Small or large speed square
- Metal ruler
- Pencil or marker
- Wedges (always helpful with any installation)
- Hexagon Y Spacers


Layout
With large hexagon tiles, you have less layout options than with "normal" tiles.
And because of the shape, the chances are almost 100% that you'll have some small and unusual cuts in some places, no matter what you do.
So don't give yourself too much of a headache trying to figure out exactly how all cuts everywhere will look in the end!
Don't try to lay out your design for every part of the room.
Instead, I recommend following similar layout steps as I outlined in the Ultimate Guide To Installing A Tile Floor.
- Firstly, you'll want to lay out your floor from the main focal point (usually the doorway) using half hexagons.
- And secondly, do the same thing with an adjoining wall, but you'll need to do full hexagons and halves (see the following photo).
- You can also switch these two steps (halves and fulls in the doorway & halves on the wall) if you think it looks better. Changing that won't really make your install more or less difficult.

Layout - half and full tiles
The main thing that you DON'T WANT are small triangular cuts in your doorway.
This will weaken the tiles in the doorway, the place that will receive the most traffic!
We address this by starting with half tiles in your doorway.
This prevents having those small, weak cuts in that delicate area - plus, it looks good!
Steps
I won't go through all of the installation steps here, since they are identical to installing standard tiles.
If you need those steps, or you could use a refresher, you can find all of that information in the Ultimate Guide To Installing A Tile Floor article.
As long as the tiles are not bigger than 12", you can either trowel your thinset on the floor or on the back of the tile.
Troweling on the floor will be quite a bit faster.
However, my recommendation would actually be to trowel the floor, then skim coat the back of each tile with thinset - this will always give you your best possible bond.
So, in place of detailing out all of the general steps for installing tile, I'll give you specific tips and recommendations just for hexagons.

Tips
1
Cabinets/Obstacles. When tiling floors with standard tiles, the work is much easier if you remove as many obstacles as possible (for example, cabinets, toilet, etc).
However, with hexagon tiles, this is even more important!
You DEFINITELY want to have as few of these obstacles as possible or you will end up having some crazy and very irritating cuts (small, weird angles, etc).
2
Spacers. In my opinion, spacers are important in every install, but with large hexagon tiles, spacers are ESPECIALLY important.
The reason for this is that, as you install the hexagons, you will certainly be pushing and pulling the tiles.
If you don't have spacers, you will definitely end up with big gaps in some parts and no joint at all in others!
I highly recommend using the Smart Spacer or Y Spacer for installing large hexagon tiles.
If you'd like to read my full review on these specialty Smart Spacers, you can check out my Smart Spacer In-Depth Review. You can find a link for the Y Spacers further up or down in this article.


Measure from the point with a tape measure

Here, we measure from the point with a ruler
3
Measuring/Marking From the Point. When you need to measure for a cut up to a wall or object and this will result in a triangular shape, use your metal ruler or tape measure and measure from the point to the wall or object (see the previous photos).
Next, lay your ruler or tape from point to point on the tile and make your mark for cutting (see the following photos).
Note: I recommend using a tape measure or ruler, here, because if you use the method that I show below, in Step #4, it can be difficult to get an accurate measurement.

Mark from the point with a tape measure

Marking from the point with a ruler

Measuring for a large cut piece

Measuring for a small cut piece
4
Measuring/Marking From the Side. The other measurement for a cut up to a wall or object will be for a straight-sided shape.
You can use a tape measure or ruler if you like (see the previous photos), but you can also use the following quicker method.
Take the tile itself and turn it around to make your mark (see the following photos).
If you do this, just make sure to account for the grout joint size and a space for an expansion joint at the wall!

Marking a large cut

Marking a small cut
5
Cutting. You will cut these tiles in the same way as you'll cut any other ceramic or porcelain tiles.
But here is where your square will come in handy.
To make cuts from a point, hold your square tight against the wet saw table as shown in the photo.
Then, you can be sure of getting a nice, straight cut!

Cutting a hexagon using speed square
And there you have it!
From here, you should be able to install your large hexagon tiles on your floor and finish your project!
If you enjoyed this article and it helped you with your project, please leave a comment or share it!
Follow us here:
Click here to share!
These are the products that I used in relation to this How-To Instruction article, if you have a need:
If you click this or any other product link on this site and make a purchase, you'll be supporting MyersFlooring.com with a small commission, which will have no additional cost to you, but we're immensely grateful for!


Everyone loves it when individuals get together and share opinions.
Great website, keep it up! I saw similar here:
Thank you! I appreciate the comment.
Wow, incredible weblog layout! How long have you been blogging
for? you made running a blog look easy. The overall look of
your site is excellent, let alone the content!
You can see similar: e-commerce and here sklep internetowy
Thank you for your comment. Honestly, I’m not particularly experienced at blogging…this is something that I try to do on the side and I write an article when I have a little bit of time…I wish I could write more often and hope to be able to write some new content soon! I’m glad to hear that you’ve found it useful.
Say, you got a nice blog post.Really thank you! Really Cool.
Thank you – I appreciate the comment!
Hello to every one, the contents existing at this website are really amazing
for people knowledge, well, keep up the good work fellows.
Thank you for the comment – I’m glad that you’ve enjoyed the content in my articles!
Thanks for your blog, nice to read. Do not stop.
Thank you much, Mark! I appreciate that! I hope to be able to write some new content for the site soon.
Wow! Thank you! I always wanted to write in my site some thing like that. Can I take part of your publish to my blog?
You’re certainly welcome, XMC – I’m glad you liked it! You’re welcome to reference my article on your blog – just please link to the original page and give me credit for the original. Thanks!