If you’re tiling a floor, there is a good chance that it will be a bathroom…and if it’s a bathroom, you’ll need to cut your tile around and under a toilet.
In this article, I’ll show you the most easy and efficient way to make the cuts around a toilet flange, so that you can set your toilet on the tile.
First, to answer a common question:
Can I cut the tile around the toilet without removing the toilet?
And my answer to this is, “Well yes, you can do that. However, you’re setting yourself up for very difficult cuts and an uglier than necessary finished look.”
There are 2 problems with cutting your tile around the toilet without removing it first.
- 1"The Footprint". If you ever have to replace the toilet in the future (because you want to or because it breaks and you have no other choice), you will have a toilet “footprint” that you have to cover, so unless you get an identical toilet or a toilet that has a larger base than the one you’re replacing, you’ll have ugly open holes around the toilet.
- 2Unnecessarily difficult cuts. The cuts will be much more difficult than they need to be and you’ll have to do extremely precise cuts in order for your project to look good (all of the cuts will be what we call “visible cuts” because there is nothing covering the actual cut area and the cuts are fully visible, so they have to be nearly perfect to look good).
For those reasons, I highly recommend removing the toilet to install your tile.
And the good news is: removing and reinstalling a toilet is actually very easy!
Removing the toilet will probably take you 15-30 minutes, unless you run into any unusual problems.
I’ll give you the basic steps, here, but since the purpose of this article is the tile side and not “how to remove a toilet”, I won’t get into too much detail. If you’d like to see an excellent and very detailed article (with pictures) on removing a toilet, take a look at this article from thespruce.com called How To Remove A Toilet.
Abdicating The Throne
The tools you'll need, here, are pretty basic.
You'll probably already have them, so I haven't put any links to purchase them, here.
- a pair of pliers, a wrench, or a ¼” socket
- flat-head screwdriver
- sponge
- bucket
- a putty knife or piece of plastic (to remove the old wax ring with)
- plastic or protective paper (to set your toilet on when it’s been removed)
- (you may also want a pair of latex or nitrile gloves because it can get a little messy and...I mean….we are working with a toilet here!)
6 Basic Steps:
- 1Turn off the water at the toilet supply line.
- 2Flush the toilet and keep holding the handle until all of the water has been removed from the tank.
- 3Use your sponge to remove the water from the bowl (you can also remove the excess water from the tank if you’d like, but it’s not critical). There are 2 main reasons to remove the water:
- When you’re moving the toilet, if there is water still in the bowl, it will tend to spill everywhere!
- Water is HEAVY – no need to be lifting more than you have to!
- 4Disconnect the water supply line and remove the caps on the sides of the toilet (these are covering the bolts that hold the toilet to the floor).
- 5Lift the toilet directly up (be careful, here - toilets can be awkward and heavy). There will be a wax ring connecting the bottom of the toilet to the drain.
- 6Remove the wax from the bottom of the toilet and from the toilet flange/drain on the floor using a putty knife or piece of plastic and clean up that area.
Ok, now that we’ve gotten past the removal of the toilet, we can get into the tiling.
For this article, I’m assuming that you already know how to plan, prep, and do all of the steps leading up to this point.
If you need to learn how to start your tile project (from Planning>Demolition>Prep Work>Underlayment>Layout) before getting into setting the tile, you'll definitely want to check out my Ultimate Guide To Installing a Tile Floor!
Now, let’s get into
cutting around this toilet!

Toilet that we need to install tile under
Tools
There are a couple of extra tools that you'll need (other than the tools you're already using to set the floor).
Those tools are:
If you click this or any other product link on this site and make a purchase, you'll be supporting MyersFlooring.com with a small commission, which will have no additional cost to you, but we're immensely grateful for!


Steps
Before getting completely into the instructions, let me make one more comment. You'll notice that we aren't trying to cut a round circle, here, and if you're OCD, that may bother you. I used to cut round circles around the toilet flange, but honestly, it's a waste of time. It takes at least 5x as long to cut a nice, pretty circle than to cut straight lines on the saw...and in the end, the whole thing gets covered by the toilet! So really, there's no benefit to taking the extra time to cut a circle around the toilet flange! (But if you really want to, it's not too difficult to do with a grinder and a diamond matrix blade)
1
Set any full tiles that you can around the sides of the toilet.
Note: if you’re doing this for the first time, you may not want to spread as much thinset on the floor as I’ve done in the example pic, since it will take you time to do these next measurements and cuts.

Spreading thinset for setting the tiles around the toilet
2
Put your tile on top of the closest full tile that is already set near the toilet flange and move it to the center of the flange, keeping the sides of your tile in line with the sides of the full tile that is already set on the floor (see photo). Then, mark your tile at least 1/16”-1/8” outside of the flange.
(if your tile covers the entire length of the flange, you’ll need to make 2 marks: one at the top and one at the bottom)

First measurement for toilet flange
3
Hold your tile over the center of the toilet flange, keeping it 1 grout joint away from the already set tiles, then mark your tile on the sides, where we’ll want to make the cuts
(see the next photo - in the example shown, it just so happened that my full tiles were directly next to the flange, so I only needed to make one mark – you’ll likely have to make marks on both the left and right sides of the flange).

Second measurement for toilet flange

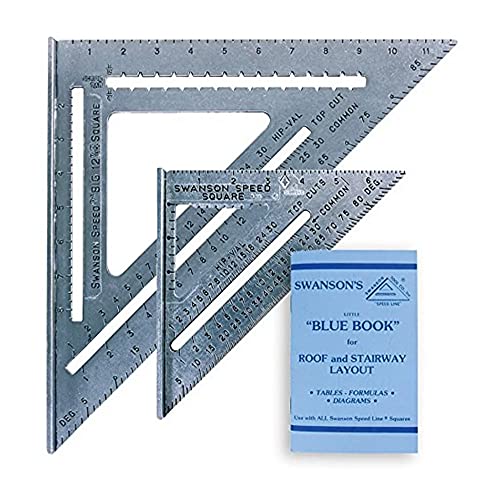
Using speed square to make lines
4
Using your speed square, draw a square around the area where the flange will be cut out (as shown)
Note: If you'd like to learn a pro tip on how to make a very quick straight line without using a ruler, speed square, or any tool, check out my article called How To Cut 1 Blade Width Off Of A Tile!

Box for toilet flange
5
Place the speed square over a corner of your square, about 1/4”-3/8” outside of the square you’ve just made, and draw a diagonal line at the corner (see next photo). Repeat this on the other corner (or all corners, if your full square is fully within 1 tile).

Making diagonal sides of toilet flange
6
If you have 2 or more tiles that will need to be marked and cut in order to cut out the full toilet flange, set your next tile over the flange, lined up with the tiles that are already set on the floor, just like what we did in step 2. Again, mark your tile 1/16”-1/8” outside of the edge of the flange.

Measuring next tile for toilet flange
7
Set each of the tiles that you’ve marked in steps 1-6 side by side, with spacers in between. This will allow you to connect the lines that you’ve already marked, so you don’t have to measure and mark the lines over the top of the flange…you already have those measurements from the first tile you marked! (see the next photo).

Marking next tile for toilet flange
8
Again, use your speed square to complete the rest of the square, then make the rest of the diagonal corners, like we did in step 5. You now have all of your marks for cutting around the toilet and you're ready to head to the saw!

We have all of our marks for the toilet
At this point, you need to check if you also need to cut out a hole for your supply line.
If you don’t have a supply line affecting these tiles, you can move on to the next step.
To measure and mark your lines for the supply line, we’ll use the currently set tiles on the floor again, like we did in in steps 1-6 above.
- 1As we did in step 2, above, place your tile on top of the closest full tile that is already set near the supply line, then move it up against the supply line, keeping the sides of your tile in line with the sides of the full tile that is already set on the floor. Then, mark your tile at the center of the supply line (be careful to check whether the supply line is leaning to one side, which is often the case and can cause your mark to be off center – we want to be centered with the pipe as it is coming out of the floor).

Marking the first side of the supply line
- 2Next, similar to what we did in step 3, above, put your tile on the other side of the supply line, keeping it 1 grout joint away from the already set tiles, then mark your tile at the center of the pipe and lengthen your lines to make a crosshair for the supply line hole. (check out the photos for the example)

Marking the other side of the supply line

Making marks into crosshairs for the supply line cutout
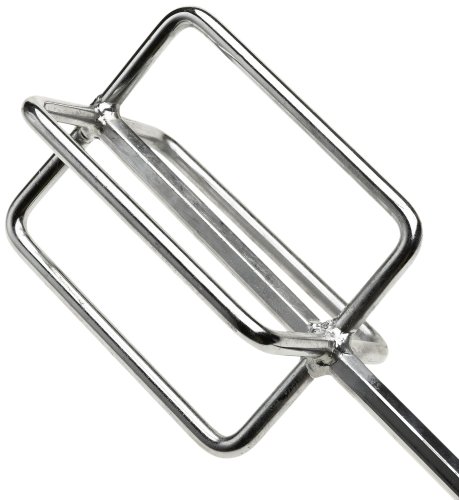
- 3Place your suction water containment ring on the tile, put some water inside the ring, then use your drill, with diamond core bit attached, to cut the hole.
- Start by holding your drill at an angle to the tile, so that the side of the core bit starts cutting in first.
- Then, after the first side has begun to cut in, rotate the drill and bit in a circular motion, so that the next part of the core bit starts to cut in.
- Continue to rotate around until you have the full circle cutting into the tile…once you’ve got the full circle cutting, you can straighten out your drill and cut directly downward until you cut completely through the tile.

Attaching the suction ring

Start drilling at an angle

Rotate around to keep the bit in place

Supply line hole is cut out
Note: it’s likely that the tile circle that has been cut out will be get stuck in your core bit. To remove that piece, you can generally use a long nail or screw and push/pull it from the bit…it can take quite a bit of pushing & pulling, but it will eventually come out.

Everything is marked and ready to cut
You’re now ready to cut out your toilet flange and if you needed to cut the hole out for your supply line, that should be done!
9
Cut in from the outside edges first (save the cuts that are completely inside of the tile until last) and cut until you reach the ends of your lines.

Cutting from outside edges first
10
Next, cut your inside lines. To do this, you’ll need to use a wet saw with the ability to plunge cut into the middle or a grinder with a diamond blade, to cut in the center of the tile.
- Note: Do your best not to cut beyond your lines, but this can be tricky. If you cut beyond the line, don’t sweat too much - it’ll probably be ok! You have a full toilet base that will most likely cover the little extra cut.

Plunge cutting inside edge

All lines are cut on the top side
11
Once you’ve got the cuts made from the top side, turn the tile over and check to see if you can see your cuts from the bottom side.

Checking the bottom
- Tip: If there are any areas where the blade didn’t come completely through the tile (there probably will be), you can turn the tile on its side (see the photo) and use your pencil to mark the back of the tile in the area where the cut should be.

Marking the bottom cuts
12
Make your cuts on the back side. Here, you’ll want to “overcut” your lines (in other words, cut past the edges of your lines by about 1/4”-3/8”).
Don’t cut too far or you’ll start cutting the front, but this is an easy way to get your cuts closer to the ends of your lines on the front.

Overcutting the bottom cuts
13
There you go! Your cut-out should pop out pretty easily.

Flange is cut out!
14
Now, you can set these new tiles that you've cut around the toilet and continue the rest of your install!

Tiles are cut and ready to install around the toilet

Tiles are installed around the toilet

Setting a couple more cut tiles

Tiles are all set around the toilet flange
Congratulations!
You’ve now measured, marked, and cut your pieces and you've learned how to install tile under a toilet!
From here, you can continue with your install and finish up your floor!
If you enjoyed this article and it helped you with your project, please feel free to leave a comment below or share it with others!
Follow us here:
Click here to share!
These are the products that I used in relation to this How-To Instruction article, if you have a need:
If you click this or any other product link on this site and make a purchase, you'll be supporting MyersFlooring.com with a small commission, which will have no additional cost to you, but we're immensely grateful for!


Amazing tips! I think most of the people did not know about floor cleaners.
Thanks for telling us about the importance of solvency. Keep sharing this post more and more.
The DIY is very well made, extremely informative and the directions are easy to follow.
Thank you, Evan! I’m glad you enjoyed it!