You might be asking the question
Can I install a tile floor myself!?
The answer to that question is: ABSOLUTELY - and I'll show you EXACTLY how!
You're in the right place.
You won't find another guide online
that's as thorough as this one!
The truth is – and I tell clients and other people this fairly often – if you know the correct steps and you are detail-oriented, not only can you complete a tile job yourself, you can do an excellent job! Now, there are some jobs that I wouldn’t recommend to a first-timer...
*cough* *cough*...pouring a cement shower pan...*cough*
...but a typical floor is not one of those, and many times, homeowners can actually do a better job than professional installers.


Ugly Tile Job - A "Professional" Installer "Finished" This Job Over a Year Before I Came
- Just because they’re a professional doesn’t actually mean they know what they’re doing… I’ve actually seen HORRIBLE tile jobs that were done by “I’ve been doing this for 40 years” tile installers and all I can say is, “Well, apparently, you’ve been doing it WRONG for 40 years!” You see,
PROFESSIONAL does not necessarily mean EXPERT!
- "Professional" simply means that you do it as a profession (in other words, you’re paid for it).
But before we really get into it, I'd like you to ask yourself a question:
Is it worth it for me to do the tile job myself?
- PHYSICALLY DIFFICULT: Tile work is heavy, hard work. There’s a reason that we installers have aching backs, sore knees, and callouses on our hands. If you can’t easily and consistently lift a large amount of weight (bags of thinset are typically 50lb each and boxes of tile range from 10lb to 100lb each), this job is going to be rough…but on the bright side, you may be exhausted enough to get some good sleep!
- $$$: When people ask me,
"Why is tile work so expensive!?"
I tell them that one of the reasons is that almost every tool that I have to use is made of diamonds...wet saw blade, grinder blade, core bits for drills, polishing grinding pads, hand polishing pads, diamond vacuum cleaner, diamond push broom.....(just kidding on those last 2!) So, anyway, you get the idea. There are ways to cut down on the costs of doing a tile job yourself (and I'll tell you about those in this article), but the truth is that there are a lot of inherent costs in doing tile work.
- WARRANTY: If you do the job yourself and it turns out to be a disaster, you have no warranty to go back on. If you hire a professional (at least an ethical one) and have a contract, we are morally and legally obligated to complete the work and complete it in a satisfactory manner – AND, you have something to fall back on if we don’t! I can’t begin to claim that I’m the best installer in the world, but I will tell you that I’m careful about choosing the clients I do work for and I’ve never even come close to going to court over a job, because I’ll do everything I can do to end with a happy customer.
satisfaction
100%
guaranteed
- SPEED: If this is your first tile job, you won’t be fast at it. Honestly, if you make $50/hr in your regular job and you’re taking time off to save $500 on a job that will take you 2 weeks to do and will take a professional 2 days to complete, it’s probably not a wise financial decision! On the other hand, if you’re doing it to learn something new and for enjoyment, good for you! Let’s do it!!
- READING: I’m not gonna lie to you, here: this Ultimate Guide to Installing a Tile Floor is a LOOONG and comprehensive guide (it's closer to a course, I'd say)!! I’m confident that I can teach you how to achieve a nice floor, but you may need to put your reading glasses on!
So, now that we’ve gotten all of that out of the way, let’s get down to the nitty-gritty. I’m going to cover all of the basics of what you’ll need to do in order to tile a typical floor yourself. For this instruction, I’m going to assume that we’re doing an interior floor and it won’t be subject to the outside elements…exterior installs have some extra things that are critical for a successful installation. Tiling walls is another category that’s related, but has some distinct differences - I’ll cover that in another article. I’m also going to assume that you are installing a tile that is not particularly big or small (somewhere between 8x8 and 16x16 – I would recommend 12x12 or 13x13 for your first tile project).
Hello! My name is Steven Myers. I am the owner and installer in Myers Flooring LLC. I do the majority of my tile work myself, alone, using helpers or subcontractors as necessary. I have been installing tile since 2007, originally doing all of the tile, wood, and laminate work in my rental houses in Phoenix, Arizona. Currently, I live and work in Colorado Springs, Colorado, USA, and I'm married to a wonderful woman with our first child born in early 2021!
I typically install between 13,000 and 25,000sf of tile per year; a mix of walls, floors, backsplashes, and fireplaces. Working on mostly residential projects, from simple, low-end tubs and baths to $17M 40,000sf houses, I average around 60% new construction, 30% remodels, and 10% insurance-related jobs. If you're interested, you can follow my projects on daily basis and see what I am working on, day-to-day, in our Photo Gallery section of the website, here. (yes, I do take these photos myself and upload them on an almost daily basis! And with the exception of 1 image - the Cake Fail found in the Prep Work section, below - every photo in this article is taken by me, of one of my projects.)
Over the years, I've worked in many, many different jobs and fields. Prior to opening Myers Flooring LLC and doing tile work every day, I was a Sales Rep in a large flooring company and taught people how to tile on a weekly basis. I spent a couple of years as a full-time missionary in Mexico, bought, remodeled, and rented out houses in Phoenix, Arizona full-time for several years, and started and worked exclusively in my Fine Art Photography business, Macrocosm Photography, for a number of years. During my younger years, I earned a degree in Graphic Design and continue to do a small amount of freelance graphic design work monthly, I worked in Information Technology for about 10 years, and I designed and maintain this website (incidentally, if you are looking to design a website, I TRULY can't recommend Thrive Themes enough - it has been an EXCEPTIONAL plugin and application in helping me design and create this site!). The list goes on and goes back further, but I won't bore you further with all of that!! Suffice to say that I've enjoyed (at times very much, and at other times, not so much) many different work experiences in my life, ranging from very creative to very technical; and, while I don't really consider myself to be a "Super-Creative" person, I believe that this mix of creative and technical aptitudes gives me a unique advantage and benefits me when it come to working with tile!


Master bathroom before
The truth is, I really enjoy doing what I do. Tile installing, to me, is a very interesting and challenging mix of technical and creative skills and gives me so much variety in my day-to-day work. Also, it keeps me in decent physical shape, especially through this bizarre COVID-19 time, when I haven't been able to do much of one of my absolute favorite activities: rock climbing at Springs Climbing Center. It's also fascinating for me to watch a house go from a blank patch of dirt to a beautiful place to live, and to see a drab, outdated bathroom go from boring to beautiful!

Master bathroom after
I hope you enjoy going through this article and that it helps you to be able to install a tile floor yourself. I'm VERY confident that, when you've finished this article, you'll feel completely comfortable with working with tile!

**Also, this entire guide is based on instruction and standards in the United States. If you're tiling in a different country, the codes, specifications, and instructions could be different - sorry, I can't help you too much with that!
Okay, boys and girls, here we go!
Planning / Measuring
PLANNING
In this stage, you’re deciding what tile you want to install and the design or pattern of the tile. There are an almost infinite number of options for this and almost all are personal preference, so your best bet, here, is to look on Pinterest, Facebook, or another resource and find a floor that you like the look of.
- The simplest tile to install, in my opinion, is 12x12 or 13x13 porcelain (smaller gets more complicated and bigger than 12x24 gets exponentially more difficult the bigger you go, due to materials, layout, cutting, etc). I say porcelain because, even though ceramic is easier to cut, porcelain is held to a higher standard of consistent size and shape than ceramic, which will help you keep your lines straight. (Natural stone is another subject…there are some other details and requirements with natural stone that we'll cover in another article)
- The simplest design to install, in my opinion, is what we can an offset. This can also be called a brick pattern, 50% offset, running bond, or ½ bond (or 1/3 bond, ¼ bond, etc).

Half Bond Floor
“WHAT!?!” you say, “The easiest is the straight lay/grid pattern!”

Straight Lay Floor
- Many people would be surprised to hear me recommend the offset and many installers would disagree with me, but I truly believe that you will achieve your best-looking and easiest results with this pattern. And, of course, I’ll show you how and why! (you see, with a straight lay, your eye is automatically drawn to all of the straight lines, so if one isn't perfect, you immediately see it, so you better be on your A-Game!...but with half bond, the lines are broken up, so if your walls are crooked, your tiles are not consistently sized, or your install isn't perfect, you don't tend to see that at all!)
- Quality of the tile: This may surprise you (or not), to hear that USA-made tile is the most difficult to work with. Because it is made at a higher temperature and baked for a shorter time than others, it is very brittle and holds a LOT of latent energy which, when it's cut or snapped, tends to split and break the tile. For this reason, it is extremely hard to cut a square hole from a USA-made tile. It will almost always split out at one of the corners (I often actually have this happen after the tile is completely cut and simply sitting on the saw - it just pops! INCREDIBLY frustrating. And I've even had this happen ON THE WALL OR FLOOR after it's been set in thinset - it pops and you see that it has broken at the point where the cut is closest to the tile edge. INFURIATING!). Without question, Italian-made tile is the best quality tile.

Argh! Tile broke on the wall

Use 1/3 bond (or straight lay) for tiles with 1 edge longer than 16"
- IMPORTANT NOTE on big tiles: if the tile you are going to install is bigger than 16” on any side, you shouldn’t try to install with a 50% offset unless you are installing natural stone…almost every manufacturer will say that they only warranty a maximum of 30% offset with large tiles, so you’ll want to do a 1/3 bond. The reason for this is that almost all man-made tiles are not completely flat – we say that “the tile ‘crowns’ in the middle”…so if you try to install the lowest part of the tile next to the middle of the next tile, you will almost certainly have lippage (unevenness between one tile and the next). You can test how much your tile crowns in the center by putting 2 tiles face-to-face (top of tile against top of tile) and pinch one edge…this will show you whether the tile is relatively flat or very crowned in the center.

Testing how much the tile crowns in the middle
MEASURING
Measuring is a critical part of this whole endeavor. If you measure short, you could be in big trouble (manufacturers frequently discontinue tile and distributors are often backordered, so you could be looking at a LONG wait or inability to get more tile if you're short!) and if you measure way long, you could be spending far more money than you need to!
- Always round up to the next higher 6” mark. For example, if your room is exactly 5’4”, consider that a 5’6” measurement. This is much easier for calculations and ensures that you are not underestimating.
- Add 10% over your full room calculation to account for cuts, breakage, mistakes, and waste. This is important. If you are doing a lot of square footage of the same tile, you may be able to decrease this number to 7%, but you’ll definitely want to make sure you have enough to complete the job!
DOING THE CALCULATIONS
Sorry for those of you who hate math…but we’ve arrived at that point where you’re gonna have to do a little bit. The good news is: it’s not difficult! Basically, it comes down to a tiny bit of simple algebra or geometry.
But don't be scared
of those big, ugly, mathy words...
walk with me, here!
When we order, we’re wanting to make sure that we have:
- Enough tile to complete our project
- Somewhere between a few extra tiles and a box left over, to save if a tile gets broken or needs to be replaced in the future (manufacturers typically rotate out/discontinue tiles about every 2 years, so you'll probably never find the exact tile again)
This room is 4’11” wide, so we round up to 5'
it is 6’8” long, so we round up to 7':
5’ x 7’ = 35 square feet
Add an extra 10% onto 35 square feet (the 1.10 is the calculation for 110%)
35 x 1.10 = 38.5 square feet!

measurements - square footage
Okay, so there you go! In this example, we need 38.5 square feet of material. I would recommend rounding that up to either 40 square feet or the next full box size (many times, you’ll have to buy your tile in full boxes).
This room is 4’11” wide, so we round up to 5'
it is 6’8” long, so we round up to 7':
5’ x 7’ = 35 square feet
Then, we subtract the measurements of the area that won't be tiled:
1'9" gets rounded to 2'

measurements - square footage2
2'4" gets rounded to 2'6"
2' x 2.5' = 5' being removed
35' - 5' = 30 square feet!
Add an extra 10% onto 30 square feet (the 1.10 is for 110%)
(30 x 1.10) = 33 square feet!
Okay, so there you go! In this example, we need 33 square feet of material. I would recommend rounding that up to either 35 square feet or the next full box size (many times, you’ll have to buy your tile in full boxes).
You’re now ready to order or buy that tile!
Recommendation on ordering tile
One recommendation that I would make, regarding your purchase of the tile, is to order/purchase the tile from a dedicated tile distributor, if possible (a few examples include Daltile, Bedrosians, Crossville, and Emser). They may (or may not) be more expensive than your local big-box store, but:
- The dedicated tile distributor will generally have a much better selection and a better product. (usually, their tiles are referred to as “First Choice” quality).
- Employees at tile shops generally are quite a bit more knowledgeable about tile than in megastores because their entire focus is on tile.
- The big-box stores are very liberal on their return policies vs dedicated tile distributors, who generally won’t allow returns (because they can't resell tile from different lots). At first, you might think this is a huge plus for the big-box stores and minus for the tile shops, but hear me out, here: when purchasing from one of the megastores, you run a HUGE risk of getting different dye lots, different tiles mixed in with other tiles, and the like… I have had numerous experiences where a client purchased tiles from a big box store, only for us to find out, partway through the job, that tiles were marked, cut, and had thinset on the backs of them, then stuck in the middle of a box of other tiles and returned to the store. That will ruin your day, I assure you!

Cut tiles hidden inside middle of box!

Broken tiles in the boxes aren't fun
- You tend to have less breakage and chipped tiles from tile shops because there is generally less overall handling (and "man-handling") of the products than with megastores. Most times, you can use broken tiles for cuts, but not if you have TOO many!

And boxes of broken tiles are very common
Below are the exact tools that I use every day for planning and measuring,
so I can attest, to you, that they'll work well!
If you click this or any other product link on this site and make a purchase, you'll be supporting MyersFlooring.com with a small commission, which will have no additional cost to you, but we're immensely grateful for!
Demolition
If your floor is demo’d, or doesn't need to be demo'd, you don’t really need to look at this step – you can skip forward to Prep Work. But if you have an existing floor, you’ll have some demolition work ahead of you.
At first, you might be saying,
“Ooh, demo is gonna be fun!
I can DESTROY things!!”

Tools for light tile demo/cleanup
And while you’re not wrong, unfortunately, it’s only fun for about the first 10 minutes….then, it becomes that dreaded 4-letter word:
W.O.R.K.
Hopefully, I can give you a few tips about tools and ways to get through it as quickly and efficiently as possible.
- Mold/mildew in or under the current floor (be careful about breathing these in – you may want to have it professionally tested and/or remediated...the traditional way to “kill mold/mildew” is by liberally spraying it with bleach, but this isn’t recommended anymore because it doesn’t really kill mold on porous surfaces, which these areas will generally be - concrete/wood/etc. The recommended method is to resolve the moisture issue - the reason why there is mold there in the first place - and scrub the mold off of the surface...and, if necessary, use an EPA-registered fungicide.) For more info, see this EPA article.

Wood around toilet flange damaged by mold
- Asbestos: the typical way to recognize asbestos in vinyl tiles or adhesive is the color BLACK. If the tiles are black or the glue underneath is black, be careful! You may want to have that tested and/or remediated before going forward! Demoing asbestos is nothing to joke about because this will release dust and particles into the air and you don’t want to be breathing asbestos particles! (note: many times, as long as the vinyl tiles are secure and aren’t loose, it’s actually best to appropriately prep the floor and tile over the top…but you have to do that in the right way, which I will cover in a different instruction guide). Here is a link to the EPA information about asbestos.
First and foremost: demo involves broken pieces of _____ (you fill in the blank – but they’re pretty much ALL sharp!), as well as tools designed to damage things.
No matter how tough you are, porcelain shards can rip a hole in you faster an easier than you can imagine - they're just like broken glass!
So even if you don’t really want to……wear gloves and safety glasses! You’ll also want to have some good kneepads and will want to have a mask or respirator on for this because it’s gonna get dirty and dusty!

Ok, so let's get into this. There are 4 typical materials that you may have to demo. You will usually be removing carpet, vinyl (vinyl tiles or linoleum), wood, or tile. These are the ways that you can demo each:
Aside from floating vinyl or wood floors, carpet is the easiest flooring to demo. All that you need to do is:
- take up the carpet (with residential carpet, it's typically just sitting on carpet pad underneath),
- then take up the pad (which is usually glued down, but the glue is not very strong and normally doesn't cover large sections of the pad),
- next, scrape the floor to remove the glue
- and finally, take a hammer and/or prybar and remove the tack strips from around the perimeter.

Demoing carpet and pad
That's it! Generally, the tools that will be most useful to you will be a hammer, prybar, and a scraper. Now, sometimes carpet can be glued down and can be a huge pain to remove (indoor/outdoor carpet or commercial, for example)...this involves more scraping to remove the glue and carpet.
CAUTION: Prior to 1980, many different flooring materials had some amount of asbestos. Houses older than 1980 and vinyl are the main things to be concerned about, but in ALL demoing activities, take special care and wear a good mask or respirator!
Demoing wood is more involved than carpet or vinyl, but less than tile. Generally, the tools that will be most useful to you will be a hammer, roofing fork or prybar, and a scraper. Wood can be installed in 3 ways:
CAUTION: Prior to 1980, many different flooring materials had some amount of asbestos. Houses older than 1980 and vinyl are the main things to be concerned about, but in ALL demoing activities, take special care and wear a good mask or respirator!
If your floor is a floating floor, you're in luck! Floating floors are EXTREMELY easy to demo because they're not attached to the subfloor at all! All that you'll need to do is remove one plank with a hammer or prybar and you'll see that the rest will come up easily. Then, you'll have a layer of underlayment underneath that is usually foam or a felt paper. Everything can be removed by hand with very little difficulty.
If your wood floor is glued down, it will be somewhat of a challenge to remove and get clean. The tools that you'll use will be a hammer, roofing fork or prybar, and a scraper. The adhesive underneath will probably be the most challenging part to get clean and flat.
If your wood floor is nailed or stapled down, it can be somewhat of a challenge to removed, but shouldn't be TOO bad. The tools that I would recommend would be a hammer, roofing fork or prybar, and a scraper. Once you get underneath the planks, the usually come up without too much difficulty. Some times, they will also be glued...if so, the adhesive underneath will probably be the most challenging part to get clean - you'll probably have to use a scraper for this.
Unless you're demoing a floating vinyl floor (this is relatively new and EXTREMELY easy to demo - it's called LVP: Luxury Vinyl Planks or LVT: Luxury Vinyl Tiles), demoing vinyl tiles or sheets (linoleum) is more difficult than carpet, but less than wood or tile. Generally, the tools that will be most useful to you will be a scraper, hammer, and possibly, a roofing fork or prybar. Whether tiles or sheets, vinyl is removed by:
- pulling it off the floor and
- scraping the adhesive underneath to remove it (if on concrete) or
- removing the wood underlayment underneath (if over plywood), then removing or pounding in all nails/staples/screws

Demoing vinyl floor
CAUTION: The main thing to watch for and be concerned about, regarding vinyl, is the presence of asbestos. If the house is older than 1980 and if the vinyl itself OR the adhesive underneath are BLACK, there is a strong chance that it contains asbestos and you probably don't want to disturb it (at least, not without professional help). As long as it's solid and not loose or crumbly, it's usually best to properly prep the surface of it and tile over the top. In ALL demoing activities, take special care and wear a good mask or respirator!
If your floor is a floating floor, you're in luck! Floating floors are EXTREMELY easy to demo because they're not attached to the subfloor at all! All that you'll need to do is
- remove one plank (you normally don't even need a tool to do this!) and you'll see that the rest will come up easily simply by unlocking from each other.
- You may or may not have a layer of underlayment underneath that is usually foam or a felt paper, but that will not be adhered to the subfloor. Everything can be removed by hand with very little difficulty.
If your vinyl floor is glued down, it will be somewhat of a challenge to remove and get clean (sometimes it's not bad, other times, it's a huge pain). The tools that you'll use will be a scraper, roofing fork or prybar, and maybe a hammer.
- The adhesive underneath will probably be the most challenging part to get clean and flat, but it's fairly important to remove and flatten as much as possible in order for you to have a good tile install (it'll help you out, later).

Vinyl adhesive on concrete
If your vinyl floor is installed over plywood, it will be a MAJOR pain to remove and get clean. The tools that you'll use will be a roofing fork, a hammer, and a nail pulling plier.
- Use a hammer and/or the roofing fork to get underneath the vinyl AND the wood underlayment, then pry and pop the wood from the plywood beneath.
- After removing all of the vinyl & wood, you'll have hundreds, if not thousands, of staples (or, potentially, nails and/or screws). Sometimes, you can pound these staples in and get them flat...other times, you'll need to pull them out. That's where the nail pulling plier comes in VERY handy.

Staples and wood under vinyl floor
You have a couple of options of how to tackle tile demo. One option is fastest and easiest but comes with a higher price tag. The other option is pretty inexpensive, but is a LOT of work!
CAUTION: Prior to 1980, many different flooring materials had some amount of asbestos, including some tiles and tile adhesives. Houses older than 1980 and vinyl are the main things to be concerned about, but in ALL demoing activities, take special care and wear a good mask or respirator!
- How it works: the hammer drill will vibrate against the side of the tile, which will either break the tile or loosen the thinset under the tile, depending on how good the bond is and what kind of tile it is. If the tile is not bonded well, many times you'll get full tiles up when demoing in this way. Using a hammer drill makes short work of most tile demo without using too much of your own elbow grease, but it does vibrate and wear on your hands and arms over time, so take breaks when you need to.

Demoing tile with a hammer drill
MANUAL: A hammer, scraper, chisel, and a roofing fork are my tools of choice for demoing tile manually. They also work well for demoing wood, carpet, and vinyl. If you’re going to demo tile in this manner, be prepared to take breaks because it could be a long, frustrating, and challenging job (or, sometimes, you get a really poorly installed floor and it’s not too bad at all)!
- How it works: a whole lot of pounding, scraping, and grunting. Be sure to take breaks and breathers when you need to, here…this is HARD, BACK-BREAKING WORK!

Demoing tile manually
So by this stage, you've finished the demo! How do you feel about that?
If you haven't already, sit down and take a breather.
You've earned it!
In each case, once you’ve gotten the material up, you’ll need to get the floor as clean as reasonably possible (a thorough sweeping is good enough at this stage because you’ll have to clean once again before installing, so unless you're REALLY feeling dirty, vacuuming is a little overkill at this point), then you’re ready to move to the next phase: The Prep.
Below are the exact tools that I use every day for demolition,
so I can attest, to you, that they'll work well!
If you click this or any other product link on this site and make a purchase, you'll be supporting MyersFlooring.com with a small commission, which will have no additional cost to you, but we're immensely grateful for!
Prep Work
All right, so either you didn’t need to do any demo (lucky you!) or you’ve completed it (nice job…I bet you’re ready to sit down and have a cold drink now, huh!?). In any case, you’re ready to move on to the Prep Work phase.
Here, there are a couple of important things to talk about right up front:
- Rigidity of the floor / Deflection (applies to wood subfloors, doesn’t apply to concrete)
- Flatness/smoothness/strength of the floor (applies to both wood and concrete subfloors)
Deflection is a measurement of how much your floor flexes and bounces with weight on it. If your floor is moving too much, this could cause your tile install to crack and fail, so this is important! If your subfloor is concrete, you don’t have to worry about this - you can skip to Flatness/Smoothness.
There are several ways to determine whether your deflection is acceptable or not.
- Some people will pull a Jurassic Park: set a glass of water in the middle of the room and walk around the perimeter. If the water in the glass ripples, you’ve got potentially unacceptable deflection and may need to put more reinforcement in your floor.
- Another option is for one person to stand in different parts of the room and have someone else walk around the room. If you feel movement or hear squeaks, you may have to take care of a deflection issue.

The official minimum specifications/calculations for a subfloor under tile are here:
https://www.tcnatile.com/faqs/30-deflection.html
If you need to further reinforce your floor, that goes a little beyond the scope of this instruction, but there are a few ways that you can fix that. You can search for “fix floor deflection for tile” and get some good results or hire someone to firm up your floor.
One thing to mention, first, in this area: installing tile is a “veneer” kind of activity, not a structural one.
What on earth does he mean by that!??
I’m saying that tile, in itself, is only as flat, smooth, or strong as the surface underneath.
Think of it as a cake: your tile is the frosting and your subfloor is the actual cake….it’s REALLY difficult to get a perfectly smooth and flat surface to a super wavy and lumpy cake just using frosting!!

Cake Fail
So, how do we check on that and what do we do about it?
Well, before we get into that (below), there is one option that you can use that can help you get a flat floor without doing a too much leveling/flattening at this stage:
These systems are very easy to use and are pretty fool-proof (you use them while installing the tile). They do add extra cost to the install, but if you want to avoid some of the flattening processes at this stage, and get great results, you can go that route (I will cover more about these systems later on, in the Tile Setting stage).
- Note: You do still need to have a relatively flat floor to begin with, even with a leveling system.
- There are many different leveling systems, and none is perfect. They all have strengths and weaknesses. My favorites are Levolution and Progress Profiles. Spin Doctor is another hugely popular system for pro installers.

Leveling system used on wood plank tiles
Okay, so now, the steps that you'll take to address flatness/smoothness in your floor will depend on whether you're installing on concrete or on wood.
With concrete, we don’t have to worry about deflection, but we do need to be concerned about flatness.

VERY uneven and sunken concrete floor
- First thing: make sure to get as much thinset, adhesive, or anything else off the concrete as possible…you want it as smooth as possible. To do this, you’ll need to use one or more of these:
- Floor scraper
- Hammer drill with spade bit
- Angle grinder with diamond cup wheel
- Hammer & painter’s tool or chisel
- Next, use an 8-foot (or smaller, depending on your room size) straight edge and draw lines and notes to mark where your floor is high or low. If the size of these waves on the floor, going up or down, is more than about ¼”, you will have a hard time getting your tiles to set flat unless you do something to get those areas flat first. If you find that your floor has waves or bumps going up, you’ll probably have to use a self-leveler to get the floor flat before you can tile (either that or grind it down). Also, you can use self-leveler to get a flat floor if your floor is really uneven because of old thinset, holes, etc. I’ll get into some detail about leveling a floor in another article dedicated to that. If you find that you have dips in the floor, you can do 1 of 4 things:
- Use a self-leveling compound (my recommendation). This is the easy way, but it does take some extra time and some extra money.
- If you choose to install self-leveler, you'll want to follow the instructions on the bag, but in general, these are the typical steps:
- Use blue tape to close off the areas where you don't want the leveler to flow (floor vents or toilet flanges, for example).
- Important: Prime the floor first: Brush or roll self-leveling primer to open the pores in the concrete to be able to receive the leveler.
- Mix it very wet. It was be almost like water.
- Pour the mixture out in the areas that are low or the full floor (self-leveler works best when pouring the whole floor)
- If there are any edges of the self-leveler (if you poured parts of the floor), use the flat side of a trowel to "feather" the edges (this just means to make the the sides as smooth as possible).
- Wait for the self-leveler to dry before proceeding (usually, it dries very fast - check the bag for times).
- If you choose to install self-leveler, you'll want to follow the instructions on the bag, but in general, these are the typical steps:
- Mix some thinset and trowel it inside your marks, then use a straight edge (a wood 2x4 or any other straight edge will work, as long at it reaches outside of the perimeter of the area you need to build up) to screed the thinset & flatten it.
- Mix some thinset and trowel out an area inside your marks, being careful to make the edges shorter than the middle (this can be inaccurate and usually takes some experience to get right)
- Plan to add more thinset to the affected area as you tile (this is an inaccurate method and can be very difficult to get the right amount without quite a lot of experience)
- Use a self-leveling compound (my recommendation). This is the easy way, but it does take some extra time and some extra money.

Self-leveler poured to smooth and lift part of floor
With wood, our main intent is to get the floor smooth enough to put underlayment down. If necessary, we'll address more of the flatness issues after the underlayment is installed.

VERY uneven wood floor
- First thing: we're trying to get the floor as smooth and flat as possible, so if there is any material remaining from the demo (if you had demo), you should try to remove it (Note: if you are going to install a cement board underlayment, the thinset underneath the cement board will give you a little bit of wiggle room, here - it can fill in some of the minor highs and lows, but only if they're not too significant). To do this, you’ll need to use one or more of these:
- Floor scraper
- Hammer drill with spade bit
- Angle grinder with diamond cup wheel
- Hammer & painter’s tool or chisel
- Floor buffer or sander
- If you have staples, screws, or nails in the floor (this is something particularly annoying about vinyl: typically, it leaves behind THOUSANDS of staples...and sometimes, tile demo will also leave behind nails or screws), they need to be pulled out, pounded in, or sheared off with an angle-grinder and metal blade
- Also IMPORTANT: If you have any damaged wood or mold/mildew, that needs to be addressed now.
- If you have mold/mildew, use a registered fungicide to kill it.
- If you have warped and damaged/weak wood, you'll need to cut that out and replace it before you move forward to putting down underlayment.
- Next, check your floor using an 8-foot (or smaller, depending on your room size) straight edge and draw lines and notes to mark where your floor is high or low.
- As long as your floor is not VERY uneven (high or low points greater than 1/4"), you're ready to put underlayment down.
- If you do find your floor to be very wavy and uneven, you may want to either grind down the high area with an angle-grinder and diamond cup wheel, or pour self-leveler over your whole floor at this time. If you do pour self-leveler, you won't have an option to do concrete board underlayment (because you won't be able to screw or nail through the cement self-leveler). Your choices will be a sheet membrane underlayment or painting on a liquid anti-fracture membrane with a brush. You will want to do 1 of those options because the plywood underneath will expand and contract enough to probably crack your self-leveling concrete layer above and crack your tile.
Staples and wood under vinyl floor
And with that, you’ve prepped your floor! Do another quick sweeping (or vacuum, if you like) and you’re ready to move to the next step: Underlayment.
Below are the exact tools that I use every day for demolition,
so I can attest, to you, that they'll work well!
If you click this or any other product link on this site and make a purchase, you'll be supporting MyersFlooring.com with a small commission, which will have no additional cost to you, but we're immensely grateful for!
Underlayment
If you’re installing your tile on a concrete subfloor, you might be able to skip this step and move straight to undercutting your doors, but there are a couple of important things to consider before skipping this (click/tap below on Concrete Subfloor). If you have a plywood floor, you definitely will need to install underlayment.
How to choose what you need to do:
With concrete, unless your floor is too low or unless you have cracks in your concrete, you don’t need to use underlayment. Unfortunately, cracks are incredibly common, so it is likely you'll need to do something to address them.
If your floor is too low, so that the finished tile won’t be acceptably close to the existing floor that it joins up to, you’ll either want to put down a layer of self-leveler or a membrane underlayment (they make several different sizes of membrane), so that the floor will be at the same finished height as your adjoining floor, accounting for tile and thinset (usually tile and thinset come about to about 1/2" in total height, but this can vary with different tiles, so you'll want to check the thickness of your tile).

Floor has sunken - needs to be leveled

Self-leveled poured on floor
If you have cracks in your concrete, you need to check and see if you have:
- Expansion Joints/cracks: These are joints that are intentionally put in the concrete slab.
- "In-plane movement" (the concrete is the same height on both sides of the crack) that created the cracks
- or if you have "heaving movement" (the concrete is different heights on each side of the crack)


If you have a wood subfloor, you’ll need to put down underlayment. It is technically possible to install tile directly to plywood with a thinset that is approved for that purpose, BUT I would NEVER recommend it. Since wood expands and contracts so easily and so strongly, your floor installation will almost certainly fail if you try!

Master bath floor to be tiled

Master floor underlayment installed
This underlayment serves 2 main purposes:
- It helps to make the subfloor (and whole floor, in general) more rigid
- It provides a good bonding surface for your tile to adhere to
Underlayment can be a waterproofing barrier (and even a soundproofing barrier, if you choose the right material), but to achieve those results, you have to use a membrane underlayment and follow the manufacturer's instructions exactly for that specific purpose. In most cases, underlayment is not installed with the intention of being a waterproofing or soundproof barrier.
There are several options to choose from, but I would recommend that you use one of these two:
This is my recommendation for a first tile project, as it’s pretty simple to work with and inexpensive). ¼” is the typical size to use on floors. ½” is available for walls, to match the drywall thickness…however, if you have to increase the height of your tile installation, you can use ½” to do this, as well. Some common brands include: USG Durock, Custom WonderBoard, James Hardie Hardiebacker

Durock backer board installed
Pros:
- Inexpensive
- easy/comfortable to cut and install
- readily available
Cons:
- very dusty/messy to cut
- minimum thickness: ¼”
- can only normally install over wood
- no warm wire option (not really a big deal for this project)
- not waterproof (if you need to waterproof, you can use a liquid waterproofing membrane)
Extra note: I don’t recommend using Hardibacker. Honestly, it’s a fine product, but VERY hard to work with, in my opinion. Here are my reasons that I can’t recommend it:
- Because it’s SO dense, it’s VERY hard to countersink screws and get them even with the floor (even if use the wafer-head screws specifically for Hardibacker)
- When screwing or nailing the corners, it easily splits out and breaks the corners
- It is more brittle than other cement boards, so it breaks much more easily
- It is heavier than others
- Being more dense, it is harder to cut than other boards,
- It is more expensive than other cement boards

Hard to get screws fully countersinked into Hardiebacker

Corners splitting out and screws won't countersink
These are a little trickier to work with, but still nothing too difficult. This option is more expensive, but not extraordinarily so. Common brands include: Schluter Ditra, Mapei Mapeguard, Laticrete Strata Mat

Uncoupling membrane over floor
Pros:
- Can provide a completely waterproof barrier, if installed properly. (I don’t usually find this necessary, but it could be more important to you, depending on your project)
- Can cut it with a knife or scissors (no special tools)
- Can install over a surface that is part wood, part cement
- Can be thinner than the thinnest typical cement board, at 1/8” (this can help to minimize the height difference between your existing floor and new tile floor)
- Some are designed to allow you to install a warm wire system (I definitely wouldn’t recommend that you tackle warm wire as a first tile project, though!)
- Designed for crack isolation, so won’t allow cracks or movement from the subfloor transfer up through the tile
Cons:
- More expensive than cement backer board
- Most of it likes to roll up on you, so you have to nail down the corners
- If not installed exactly correct and quickly, can come up easily (fabric backing can release from the thinset)
- Not as readily available as cement board
Now that you've chosen what you need to do, it's time to install!
So, you’ve chosen to install cement backer board. It's a good choice - this is my recommendation for installing on a first tile floor install. I think you'll find that cement board isn't too difficult to install.
Basic/Necessary: Angle grinder, Diamond turbo blade, Framing square/Adjustable drywall square/4' level, Extension cord, Drill, Coarse-thread 1/4" screws
Advanced/Useful: Collated screw gun
Important notes and tips:
- As much as possible, try to lay the sheets in the same direction.
- Important: Make sure to offset the sheets. You never want to have 4 pieces coming together at the same junction.
- Time-saving Tip: I prefer to put the labels & writing face-down, so that I can see my marks better and I don’t have to take the time to remove the labels

Cement board layout, Good vs Bad
Installation Steps
- Measure your width and length of the room. If you have any sections that will fit full sheets (normally 3’ x 5’), set those down first.
- Measure and cut the remaining pieces, from biggest to smallest and set them in their space.
- Note: You don’t need the sheets to be super tight to each other, but no large spaces between, either. Different manufacturers recommend different things on this, but for the most part, putting the sheets close together or with a 1/8” gap will work well.
- Once everything is set in place, take them back up, keeping them in order (one easy way to keep track of where they go is to number each piece and/or take a picture), and put them to the side.
- Mix some thinset (this can be modified or non-modified thinset – use something cheap). You want to mix the thinset to about the consistency of peanut butter.
- Note: the function of this step is not really to glue the backer board to the floor underneath, so strength is not particularly important. The purpose of this is to fill in any small voids/holes/bubbles between the backer board and the floor.
- Using a ¼” x ¼” notched trowel, spread the thinset on the floor, holding your trowel at a 45 degree angle and raking (troweling the thinset) it in one direction, then set the cement board pieces in their place.
- Note: the reason you want to trowel the thinset in the same direction is so that, when the cement board gets pushed down into the mud (thinset), the air will escape out from under the pieces in one direction and create a consistent and full layer underneath.
- Walk around the room, on top of the cement board, embedding it into the mud.
- Screw down the backerboard. The proper spacing is every 6” around the perimeter of each piece and every 12” in a grid through the center. (roofing nails are also acceptable, but screws are better)
- Take fiberglass tape and cut it and lay it over all seams/joints between pieces of cement board, then take thinset and the flat side of a trowel and cover the fiberglass tape with thinset. Your goal, here, is to leave this as flat as possible, while covering the joint, making your underlayment seamless and solid. (You can also do this step directly before installing the tile, which is often easier because you'll already be mixing thinset and have the tools out for that.)

Full sheets first - offset

Measuring/marking/cutting backer board

Thinset troweled under backerboard

Screwing it in with screw gun

Cement board finished
So, you’re going to install an uncoupling membrane. These can be a little tricky, but you can definitely handle it!
Basic/Necessary: Utility knife/Scissors, Drill/paddle/trowel/thinset, Magnesium float (or a blunt tool to rub the mat and push it down into the thinset), Hammer, Roofing nails (and/or heavy tiles to set on the membrane corners to hold it down)
Installation Steps
- Vacuum/clean the floor, to remove anything that might cause a bump under the underlayment.
- Unroll as much of the membrane as needed in the longest part of the room and cut it to this length (you can use a knife or scissors). You may also be able to use the membrane in squares (available from some manufacturers)...this can be quite a bit easier to work with because it tends to roll up less.
- Measure and cut the remaining pieces, from biggest to smallest and set them in place.
- Mix some modified thinset to a consistency wetter than peanut butter. It shouldn’t be like water, but you should be able to pour it out of the bucket.
- Note: You don’t normally mix thinset to this consistency, but in this case, you need it particularly wet to be able to more easily embed the membrane into the mud.
- Using a 3/16” x 5/32” v-notch trowel, spread the thinset on the floor, holding your trowel at a 45 degree angle and raking (troweling the thinset) it in one direction. Only spread about a 3’ x 4’ area under the membrane (if you spread too much, it will start to dry out before you can push the membrane into it). Then roll or place the membrane onto the mud and continue until you have thinset under the full piece.
- Note: you want to trowel the thinset in the same direction so that, when the membrane gets pushed down into the mud (thinset), the ridges will collapse and the air will escape out from under the pieces in one direction and create a consistent and full layer underneath.
- Once you get a full piece (whether it’s large or small) set in the mud, use a magnesium float or similar tool to push or rub over the membrane and force it down into the thinset (a magnesium float works very well because it will allow you to rub and force the membrane into the mud without damaging it, but you can use any tool with a long, blunt edge that you can scrape or rub over the membrane and press hard to get the membrane embedded). You will have to put some muscle or weight into it to get it well embedded and you should see a slight change in the color of the membrane - a little darker - as the membrane gets embedded and you have thinset in contact with the backing.
- IMPORTANT: Watch carefully around the edges of the membrane, to see if they curl up (if it was rolled before, it will want to return to that shape). You will likely have to put some nails (if installing on wood) or heavy things (if installing on concrete or wood) into the outer edges of the membrane, to keep it from coming up. If the edges do roll up and you don’t catch it and keep them down, you will REALLY struggle to get your tile down flat if the thinset underneath dries with the membrane curled up.
- The membrane can be walked on (or you can start setting tiles) immediately. You don't have to wait for the thinset to dry; however, if the edges are trying to roll up on your and you've used tiles (or heavy things) to hold them down, make sure to leave those on until the thinset has dried or you have tiled over them!

Floor to be underlaid and tiled

Rolling out membrane and cutting to size

Thinset down for membrane

Installing first part of membrane

First line of membrane is down

Forcing the membrane into the thinset

Left half is slightly darker because it's embedded in the thinset

Edges of membrane are trying to curl up

Putting nails in to hold membrane down

Uncoupling membrane underlayment installed
That's it! You’ve now got the underlayment down!
Whether you did backerboard or membrane, you can walk on it immediately and you can move to the next step, which is undercutting your doors.
Undercutting the doors: Once you have your floor as flat as possible and your underlayment down (if you needed to do underlayment), you can move to the next step, which is undercutting the doors. Depending on what material (if any) you had in this room before, you may not need to undercut the doors (they may already be cut)...or, if you have removed the door casings and will be replacing them, you don't need to worry about that. But if your tile won't fit underneath the door jamb and/or the door casings, I would definitely recommend this step. You can choose not to undercut the door jambs and casing, but this will make your end result look less “clean” and professional and make your cuts quite a bit more difficult. In my opinion, it’s definitely worth cutting them. To undercut the doors, you have a couple of options:
A dedicated undercutting saw, like the Crain 812 Super Saw (this is the one I use), is an excellent option that gives VERY quick and EXTREMELY pretty results (you can undercut both sides of the door jamb and door casings in less than a minute with basically no effort), but generally will be more expensive than someone just starting out and/or only doing 1 floor would like to spend. (there are less expensive options, however, so if you're looking at a quick and easy tool to make perfectly precise cuts, this is it!)
How to do it: First, you place a tile on the floor, then put the saw next to it and adjust the height of the blade to the top of the tile. Next, you will rotate the saw around the door jamb, cutting the casing and jamb in the process. You'll probably also need to use a multi-tool to cut the inside corners (if you have them), where the door casing meets another wall). Then, you'll use a hammer and painter's tool to tap out the notch where the tile will end in the door jamb.
Note: Be careful when cutting! As with any saw, the blade is running at high speed and is sharp - and this blade is cutting sideways instead of up/down!
A multi-tool with a wood blade is much less expensive than the dedicated undercutting saw (you may even already have this tool at home) and relatively precise and pretty quick. Blades don’t last very long at all, but if you’re only having to cut a couple of doorways, a blade should easily last through that.
How to do it: Place a tile directly against your door with a piece of cardboard underneath (this is to account for the height of the thinset that will go underneath - these multi-tool blades are EXTREMELY thin, so you need to have that cardboard for spacing), then use the multi-tool to cut the door right at the top of the tile.
Note: Make sure to try to keep your blade flat with the tile...one common mistake in this process is to let the blade go up or down while cutting, which will make your final cut less precise.
A manual undercutting saw is, by far, the cheapest option, but it’s fairly difficult and quite a bit of work (especially if your doors are hardwood). But again, if you’re only doing 1 floor and only have a single doorway, you can certainly do this pretty quickly and without spending much.
How to do it: Place a tile directly against your door (you may need to put a piece of cardboard underneath, to account for the height of the thinset that will go underneath the tile, but you may not, if the blade of your saw is thick), then use the saw to cut the door right at the top of the tile.
Note: This can take a while and be a little frustrating, but if you're only doing it on one doorway, you'll get the hang of it!
Best practice on how far in to cut the door (which is also the best practice for where to start the tile) is in the center of the actual door itself, not in the center of the door jamb and not one side of the door jamb. This way, when the door is closed, you only see one type of floor from each side of the door (for example, only tile from the room you're working in and only carpet/wood/other tile from the room on the other side).
And with that, you’ve finished with underlaying and undercutting! Do another quick sweeping (or vacuum, if you like) and you’re ready to move to the next step: Layout.
Below are the exact tools that I use every day for installing underlayment,
so I can attest, to you, that they'll work well!
If you click this or any other product link on this site and make a purchase, you'll be supporting MyersFlooring.com with a small commission, which will have no additional cost to you, but we're immensely grateful for!
Layout
I decided to make this section its own category because it’s probably the most difficult part for many people to do; and I won’t sugar coat it, it can be INFURIATING! But it’s also one of the absolutely most important steps to do in order to get achieve the outcome you're looking for. Fortunately, layout isn’t nearly as difficult on floors as it is on walls and it doesn’t have to be so mind-blowingly difficult as it may first appear. I’m confident that you can get it done quickly & easily!
Let's do it!
Firstly, if you’ve heard or read that you should measure your room, find the center, and draw or snap lines: DON’T! In my opinion, the whole “find the center of the room and make your install symmetrical, starting from the center” is usually a huge waste of your time and makes your install look worse.
No, you don't want equal cuts around the perimeter!
The reason is simple:
How important is it, to you, that you have pretty and symmetrical and perfect tiles underneath your vanity? Or under your washer & dryer? Or behind your toilet?
If you’re like me (and every single client I’ve ever had), that comes in at, oh, let’s say about priority #15!
Now, how about this:
How important is it, to you,
that your floor look its best in the
first area that you see?
I think you’re getting where I’m going, here.
The MAIN FOCAL POINT to the room is your main concern! Normally, this is the doorway where you enter.
I’ll bet you’ve never heard of the little-known phrase, “First impressions are everything.” (Sorry for the sarcasm, there, but I just had to!)
If your tile doesn’t look the nicest in the first place that you see as you’re walking into the room, your first impression is that it’s a poorly done job.
So, there we have it!

Layout - main focal point
Almost always, the main focal point is the entry doorway!
How easy is that!?!
Don’t start in the center!!
Don’t measure and find the center!!
Don’t snap lines in the center!!
WHO CARES about what the tile looks like in the parts of the room that are covered by things??? We care most about what the tile looks like in the most visible area!!
So, now that we’ve established that you’re almost always going to start at the doorway, what’s our next step? Here’s the other simple rule:
And there we go!
You should now have a good idea on how you want to start the layout for your floor!

Layout - how to start
So, now that we know that you will almost always start your layout with the doorway, we can continue with our layout.
Here’s where the “measuring” part of the layout comes in. But don't worry too much about that scary measuring word - I think you’ll find that it’s really not that hard.
We're going to do the measuring, now, and it's a little long, but it's not very difficult.
All that you really need, here, are your tiles and a pencil or marker - you don't even need a tape measure!
How difficult can this measuring be
if you don't even need a tape measure, right!?
- Take one of your tiles and lay it down in the doorway, where you want your floor to start.
- Determine what grout joint size you need or want to have in your installation. (You may be asking, “Why can’t I have no grout joint or very small joint?” I’ll cover that in another article…but it has to do with finished strength of your floor and the variation in sizes of the tiles)
- Note: If you’re having a hard time figuring out what grout joint size you should use or you just want a general recommendation, I’d advise 3/16” (or 5mm). Also, the bigger your grout joint, the easier it will be to make your lines straight, so you can do whatever size you'd like, but you should be able to get straight lines on almost all tiles using 3/16".
There are 2 main ways to determine appropriate grout joint size (this is important: going with a smaller joint size than you really can or should will cause you HUGE headaches during your install):
- Look on the boxes of tile (it is sometimes here - not always, unfortunately)
- Look on the tile manufacturer’s website – typically, they will specify what their recommended minimum grout joint size is in the technical information on that specific tile.

Recommended minimum grout joint size
There is a 3rd method, but I think you’ll only like it if you’re a technical nerd like me…and for a first tile project, you shouldn’t need to get into this, but I’ll show it to you, just in case. This is an illustrated version derived from the TCNA (Tile Council of North America) Handbook: TCNA Page: Grout Joint Size

Find Minimum Joint Size
- 3Next, place another tile next to that first tile, putting your spacers between the tiles (don’t worry about pattern at this point – we’re just measuring).
- 4Continue with more tiles and spacers, in this way, until you reach the opposite wall or obstacle (ie. Bathtub). You’ll be able to see what size of cut you’re going to have at this opposite side. Our ideal situation is that it will be larger than ½ of a full tile…but it’s okay if it’s smaller, as long as it’s not less than 2” in size.
- 5If this cut looks like it will be a nice size (ie. Anything bigger than ¼ of the full tile size), you will plan on installing with a full tile in the doorway where you started. If this cut looks like it will be too small, you’ll plan to start with a ½ tile in the doorway
- 6Follow the same process with tiles and spacers for the other direction of the room. (starting from the most visible/focal point corner of the room…generally, this is the corner where the doorway is)
That’s it!
Remember: we don’t really care TOO MUCH about any area that is going to be hidden or covered by something, so if you’re doing this measuring and find that the opposite side of the room is going to result in a 1” or 1.5” cut, but it’s going to be completely covered by a vanity, NOT A BIG DEAL – stick to the full tile on the opposite/visible side! We care more about what the VISIBLE area of the room looks like than what’s under a cabinet, behind a toilet, or covered by something.
One final note: if you go through this process and find that your room is not square and some of the walls are crooked, don't get bent out of shape! That’s very, VERY common (just as common in brand new houses as in very old houses, unfortunately). This doesn’t mean that your house is horribly constructed or garbage! But that is the MAIN REASON why we don’t want our tile to finish on the opposite wall with a small cut tile or a full tile (unless it’s under something or hidden by something): you’ll have to cut your tiles to match your walls and if you have a crooked wall (which, honestly, you probably will – it’s that common) and you have a little tiny piece, that 1.5” sliver may go from 1.5” to 3” in size or it may go from 1.5” to nothing! And THAT is very noticeable and very ugly…you want to avoid that whenever possible.
Patterns. One last word regarding patterns: there are many, many different options for patterns, but as I said in the beginning, my recommendation for your first tile job would be a offset pattern. Here's the reason for that recommendation:
- Attractive: It looks really nice for little extra effort. (in my opinion, it looks a lot nicer than a grid pattern/straight lay)
- Less waste: When you install an offset pattern, you have cuts of different sizes on 2 sides of the room. For example, if you do 1/2 bond or "brick pattern" (1/2 offset), your starting side will have a full tile, then a 1/2 tile, then a full tile, etc... You can usually use a lot of your extra cut-off pieces and broken pieces on the opposite side.
So, at this point, you should pat yourself on the back. You’ve just completed the most critical part of the aesthetic part of your install – the Layout! Brace yourself – you’re now ready to start installing!
Below are the exact tools that I use every day for doing layout,
so I can attest, to you, that they'll work well!
If you click this or any other product link on this site and make a purchase, you'll be supporting MyersFlooring.com with a small commission, which will have no additional cost to you, but we're immensely grateful for!
Setting The Tile
Well, I’m sorry to say that, most likely, you thought this would be Step 1 in this whole process...
What HGTV and Pinterest imply will be the process:
Step 1: Set the tile - about 5 minutes
Step 2: Grout the tile - between 10 and 30 seconds
Step 3: Stand back and grin from ear to ear to see your magnificent new tile floor!
Total time from start to finish: 5.5 minutes!!! **audience screams and applauds**
….and instead, you’ve spent countless hours reading and studying all of my rambling and poor attempts at humor. But believe me, in the end, you won’t regret that you went through those other steps – they are critical to your success and you’re well on your way to that Step #3 and an EXCELLENT finished product!! (I can’t really speak to the grinning from ear to ear part…but I hope that will be part of it, too.)
So, here we are at the main attraction, the magnum opus, the pièce de résistance: The Tile Setting phase. I’ll be writing another article that will give examples of the specific tools used to set tile, from the very basics that are necessary up to the tools that we professionals typically use, but for now, here are the basics:
Here are the 6 basic tools that you'll need for your tile project:
- 1Wet saw. Either a wet saw or, at a minimum, an angle grinder with a diamond matrix-head blade. You can also use a tile cutter/snapper, but if you do, you will still need a grinder or saw for non-straight cuts.
- 2Mixer. A mortar mixer or a drill with a mixing paddle.
- 3Buckets. Rubber buckets are great, but 5-gallon paint buckets work fine. I use a 3.5 gallon bucket for thinset – it’s more comfortable than a 5-gallon bucket.
- Note: Paint buckets are much better quality than most big-box-store-bought buckets, so if you can get some used paint buckets, they will last you a lot longer! Not to mention, they're usually FREE!

Setting up the tools
- 4Trowel. A trowel that is the appropriate size for installing your tile. This is an important thing because if you use too big of a trowel, you’ll have to do a lot of cleaning of thinset from your grout lines during, or after, you install (this is a big headache) and if you use too small of a trowel, you won’t get enough coverage of thinset between your tile and the subfloor (this is a major failure risk)
Choosing the right trowel size isn’t a real difficult process, although it does make a difference how flat your subfloor is and how flat your tiles are. If your subfloor isn't flat or your tiles crown a lot (meaning if they bow up in the middle...all manmade tiles crown, to some degree, but some are worse than others), you may need to bump up to the next larger trowel size in order to get good coverage of thinset. But in general, this is a pretty standard summation:
- Mosaics or under 2”, small v-notch (3/16”x5/32”)
- Up to 4”x4”, big v-notch (1/4”x5/16”)
- Up to 8”x8”, small square-notch (1/4”x1/4”)
- Up to 12”x12”, medium square-notch (1/4”x3/8”)
- Up to 12”x24”, big square-notch (1/2”x1/2”) or Euro Notch
- Bigger than 12”x24”, Euro Notch or BIG trowels (DON'T TRY THIS KIND OF TILE for your first tile project – there are a LOT of big, critically important steps for really large tile and Gauged Porcelain Panels!! If you don't do EVERYTHING right, the failure risk is ENORMOUS!)

Tile trowel sizes
- Note: If you're doing your first tile job and don't know if you'll do more, the cheap/disposable trowels (of the right size) will work just fine. If you clean them, they'll last through quite a few uses...or you can get multiple and throw them away when you're done with them.
- Tip: We do push the boundaries a little bit on trowel sizes – I will generally not switch to a 1/2”x1/2” trowel until I’m over a 16x16 tile size…also, I’ll almost never use the small v-notch because it just doesn’t leave enough material underneath for a good bond.
- 5Spacers. Tile spacers of the appropriate size and shape. Back in the Layout phase, we talked about grout joint size, but for a recap:
Size:
- Note: If you’re having a hard time figuring out what grout joint size you should use or you just want a general recommendation, I’d advise 3/16” (or 5mm). Also, the bigger your grout joint, the easier it will be to make your lines straight, so you can do whatever size you'd like, but you should be able to get straight lines on almost all tiles using 3/16"
There are 2 main ways to determine appropriate grout joint size (this is important: going with a smaller joint size than you really can or should will cause you HUGE headaches during your install):
- Look on the boxes of tile (it is sometimes here - not always, unfortunately)
- Look on the tile manufacturer’s website – typically, they will specify what their recommended minimum grout joint size is in the technical information on that specific tile.
Recommended minimum grout joint size
There is a 3rd method, but I think you’ll only like it if you’re a technical nerd like me…and for a first tile project, you shouldn’t need to get into this, but I’ll show it to you, just in case. This is an illustrated version derived from the TCNA (Tile Council of North America) Handbook: TCNA Page: Grout Joint Size
Find Minimum Joint Size
Shape:
For the shape of the spacers, if you’re doing a straight lay/grid pattern, you’ll use cross spacers and if you’re doing an offset, you’ll use t-spacers.
- I highly recommend Tavy spacers because they’re made from hard plastic and don’t compress, are easy to use and to remove, and are very consistent. They also can be used 2 ways: in a corner joint or as on a straight edge.
- I don’t recommend using hollow/leave-in spacers or rubber spacers, for various reasons. For example, they compress with weight and pressure, they can cause the grout to be weak, etc… They do have their place, but I wouldn't recommend them for a first project.
")
Tavy Cross-Spacers (3/16")

Tavy T-spacers (1/8")

Hollow spacer compressed and bent

Grout missing above hollow spacer
- 6OPTIONAL, but can be VERY helpful: a leveling system, t-locks, or both to help you get the tiles flat. There are many, many options for this. My favorites are: Leveling System: Levolution, T-Locks: Hermes’ Land.

Leveling system - before tightening

Leveling system - after tightening

T-lock system - before installing

T-lock system - after installing
Here are the 2 basic materials that you'll be using for your tile project:
- 1Thinset. It’s important to choose the right thinset for your project. If you choose a thinset that is not strong enough to bond the tile you’re installing, the tiles will likely come loose and your installation will fail.
- 2Your Tiles. I recommend, first, checking the dye lot on all of your boxes, to make sure that you have the same lot. This is VERY important.
Dye lot is a code that the tile manufacturers print on the boxes that indicates the color (the “tone”) and size (the “caliber”) of their tile. This code is often 3 or 4 digits, a space, and another 3 or 4 digits, but it can be completely different between different manufacturers. Since the manufacturers make tiles at different times, in different batches, the color and physical size varies from batch to batch (sometimes a little and sometimes a LOT), so you want to ensure that you have all the same dye lot before you start! Believe me, there’s nothing worse than installing most of your floor, then finding out that the remaining 1 or 2 boxes have a different dye lot with LARGER tiles than what you’ve been installing - or a different color than the others!

Dye lot on box
A little story about dye lot
There was a house, a number of years ago, where I was installing the master bathroom floor, among other things. The homeowner had ordered 18x18 porcelain tiles through a small carpet/flooring retailer before I started the job and they wanted to have the smallest grout lines possible.
The tile manufacturer’s minimum grout joint recommendation was 1/8”, so I began installing those tiles with that size of joints. I was about 75% through installing the floor when I found out that 2 of the remaining 3 boxes were a different dye lot – and the tiles in those boxes were 1/8” BIGGER than all of the tiles that I had already set!
Needless to say, if you have 1/8” grout joints and now, you have 1/8” larger tiles, that leaves zero space for grout: DISASTER!
I was very fortunate, in this case, that I was able to cut down the tiles and use them in the closet and it ended out working ok, but it was a VERY stressful thing and not something I would want you to run into, especially on your first project!!
Ok, so we’ve arrived at the point where you’re ready to start installing the tiles yourself! You’ve done your planning, prep work, underlayment, layout, you’ve got your tools, and you’ve got your material!
Let's install some tile!
You may have already done this before installing underlayment, but it's worth doing a couple of things again. The more flat your floor is, the easier and more successful your install will be!
- First thing: If there is any thinset or adhesive on the floor, make sure to get it off...you want it as smooth and flat as possible.
- Next, use an 8-foot (or smaller, depending on your room size) straight edge and draw lines and notes to mark where your floor is high or low. If the size of these waves on the floor, going up or down, is more than about ¼”, you will have a hard time getting your tiles to set flat unless you do something to get those areas flat first. If you find that your floor has waves or bumps going up, you’ll probably have to use a self-leveler to get the floor flat before you can tile. I’ll get into some detail about leveling a floor in another article dedicated to that. If you find that you have dips in the floor, you can do 1 of 4 things:


VERY IMPORTANT NOTE of caution before we start to install: When you are following these next steps, DON'T install your tile directly against any walls or other surfaces. You need to leave an expansion joint of at least 1/8"-1/4" around the perimeter of the room and against any object (a bathtub, for example) - the purpose of baseboards around the perimeter of the room and caulking next to objects like bathtubs is to cover this joint. If you don't do this, you could potentially have a CATASTROPHIC failure after installing the tile! Sometimes it will happen right away and other times, a long time in the future or never...but it can be dangerous - tile has been known to fly up and embed into the ceiling because of the force of this expansion. Here are a couple of links to videos where the installer has not left a proper expansion joint:
Scary Example #1: Popping Floor Tiles
Scary Example #2: (Warning: Explicit language): Exploding Tile Floor!
This section is long, but this is what you've been waiting for! I'll try to make it as easy to follow as possible.
- 1Mix your thinset. I would recommend mixing a relatively small amount, this first time – maybe about 3-4 inches in the bottom of your bucket. As you install, you’ll get an idea of how much you can use before it starts to harden and you can adjust how much you mix with the next batch. Each thinset manufacturer has their own instructions on the bag that you should follow, but these are how most typical thinsets are mixed – my suggestions for your first time:

Mixing thinset
- For the first time (after the first time, you'll get a better feeling of how much thinset you can mix before it gets unusual), pour in about two cups of water, then pour in a small amount of powder, then mix. Don’t mix too fast – if you whip the mixture, you’ll introduce extra air bubbles into the mixture that will weaken the thinset, so try to keep your mixing speed under 300rpm (low speed on your drill or mixer). Add more water or more powder until your mixture reaches the peanut butter stage and you’ve mixed 3-4” worth in your bucket.
- 2Let the thinset slake, (or sit in the bucket) for at least 10 minutes (again, this time varies from brand to brand, so check the bag), then mix it again in the same way, but don’t add any more water at this step.
- Note: even if you already know the instructions, it’s worth double-checking the bag because manufacturers will sometimes change their instructions. For example, Mapei modified their instructions on their Ultracolor FA grout and took out the step for letting it slake before installing after I’d been using that grout for a couple of years…I would’ve never known this if I hadn’t checked the bag!

Thinset consistency
- 2Lay out some tiles in strategic places, so you don’t have to constantly stand up and get back down on your knees. Also, I would strongly recommend that you intentionally mix tiles from separate boxes, as you install. This way, if you have all similar tiles in one box, you won’t have a big block of tiles that are different from the rest of the room.
- Natural Stone. This is especially important with natural stone: install from 3-5 different boxes at the same time to ensure that you have as much of a varied blend as possible!
- Any Tiles. I HIGHLY recommend NOT going through your tiles (whether they’re ceramic, porcelain, or natural stone) and picking the ones you like and don’t like…the reason for this is that, if you exclude some tiles and you end up not having enough of the “liked” tiles, when you get to the end of your project, you’ll have no choice but to install a solid group/block of ONLY YOUR REJECT TILES…and this will make your installation look really bad! A better choice is to mix the tiles together as well as possible. If you really need to use a tile that you don’t like, you can make sure to install that in an inconspicuous place, like under a cabinet or in a closet.

Tile floor installed without blending boxes
- 3Make your first cuts. Generally, your first cut will be under the door jamb, so once you’ve cut it, slide the tile into place to make sure that it fits and that your cut is accurate.

Drying the back of tiles after cutting
- Note: You will probably want to keep a rag or towel near your saw, so that you can dry off the back of the tile after cutting. If the tile is too wet, the thinset won’t stick to it very well - especially with porcelain, the thinset will just slide right off of a wet tile.
- 4OPTIONAL (but easy & recommended): Take a damp sponge (not soaking wet, just damp) and quickly/lightly dampen your floor before spreading thinset over it. This helps to ensure that the subfloor doesn't pull extra moisture out of your thinset prematurely (this can decrease your Open Time, in other words, cause your thinset to lose its "stickiness" before you have your tiles installed in it). This also cleans the surface right before you trowel your thinset and ensures that you have a better bond.
- 5Trowel your thinset on the floor, covering only the area of about 2-4 tiles.
- Important Note: First, here, if you're using a membrane underlayment, it will have textured holes in the surface. It is important to fill these holes as you trowel your thinset. The steps are the same as troweling on cement board, but you'll use more thinset because you will be filling those spaces before troweling your thinset lines.
- Using your trowel, take some thinset from the bucket and spread it thickly over the floor, holding your trowel almost flat to the floor, "pushing" the thinset into the floor (this is called "keying in" the thinset into the subfloor).
- Then, holding your trowel at a 45 degree angle from the floor, pull your trowel through the thinset, scraping the floor with the tips of the notches, raking (pulling) it in one direction.
- Repeat this until you’ve covered an area of 2-4 tiles, with your thinset lines running in the same direction.
- Note: the reason you want to trowel the thinset in the same direction is so that, when the tile gets pushed down into the mud (thinset), the air will escape out from under the pieces in one direction and create a consistent and full layer underneath, without leaving voids or air pockets underneath.
- Check for spots with insufficient thinset and, if you find some, put a small amount of thinset on your trowel and rake over that area to fill in the low spots. Your thinset should look pretty consistent, with lines of the same size and shape, all in the same direction.
Lookin' Good!

Taking thinset from bucket to floor

Keying in the thinset into the floor

Before raking the trowel through thinset
 the trowel through the thinset")
Raking the thinset

Repeat for an area of 2-4 tiles
- ALTERNATIVE: If you have an area of floor that is small and difficult to get your trowel in, you can trowel thinset on the back of the tile instead of on the floor, then install the tile in the usual fashion.

Backbuttering - "load" the tile

Backbuttering - key in the thinset

Backbuttering - raking the thinset

Backbuttering - continue keying in

Backbuttering - clean extra from the sides
- 6IMPORTANT: You need to achieve at least 80% coverage on the back of the tile with ceramic and porcelain tiles and you need to achieve at least 95% coverage on with natural stone. So, something that is OPTIONAL for porcelain or ceramic tiles, but NECESSARY for natural stone: Skim-coat the back of each tile before you set it into the mud on the floor.
- To skim-coat the back of a tile, hold the tile upside down and place some thinset on it. Using the flat side of your trowel, remove almost all of the thinset, leaving only a thin layer on the back of the tile. This helps ENORMOUSLY in giving you the best possible bond between your tile and the floor.

Skim coating back of tile

Skim-coat on the back of a tile
- 7Set your tile on the thinset and lightly push it in. With the first tile, if it’s a cut under a door jamb, you’ll have to set it down and slide it under the door jamb.
- Note: If the door jamb is cut too low, you can take a multi-tool and cut it with the tile butted up to the wood, so that you can remove whatever is necessary to be able to slide the tile under.
- 8Once that first tile is set, you’ll cut (if necessary) the next tile and install that by placing it directly against the last tile, then pressing lightly and moving it away from the last tile the thickness of the spacers…this will help to collapse the ridges of thinset under this tile without having a beat it with a mallet or wiggle the tile back and forth (you may still need to apply more pressure or tap the top of the tile with a rubber mallet if the tile is sitting too high). Also, if you find that you need to cut a very small amount off of a tile to get it to fit right, there's a simple trick that you can check out my How-To article on doing exactly that here: How To Cut 1 Blade Width Off Of A Tile.
- 9Repeat these last few steps (spreading the thinset, setting the tiles) until you’ve used all of your thinset. Once you’ve done that, you’re ready to mix up a new bath of thinset and continue!

Tile butted up to next

Pressing and moving tile away
- Note: If you are starting at the doorway, I would recommend setting one side of the doorway, then setting tiles around the perimeter, as in the following image.

Partway through tiling the floor
- If you’re starting from the doorway, you may need to “dry set” a few tiles, so that you don’t block yourself into the room. This is simple – you just put the tiles down as if you were setting them, put spacers in and everything, but don’t put any thinset underneath. Then, once you’re done and finishing/exiting the room, you can take those tiles up and put thinset under them as you come out of the room. (Note: you can usually walk on porcelain tiles that are dry set without them breaking, but ceramic tiles are weaker and you may not be able to walk on them.)
- Below is an example of using dry-set tiles to ensure that you can still have a walkway. You'll set these tiles last in the day.

Tiles are dry-set through the middle

Dry-set tiles removed and set at the end
- 10One last IMPORTANT thing: Every so often, while you're installed tiles, use your painter’s tool (5-in-1) to take the tile back up and check how well your thinset is covering the back of the tile. Again, you want to have at least 80% coverage with ceramic and porcelain, at least 95% with natural stone. If you’re not getting sufficient coverage, one of these things is probably the cause:
- Your thinset is getting too dry in the bucket. This is called "Bucket Time" or "Bucket Life" (more info in the next section, below). If this is the case, you can mix your thinset again with the mixer or drill, but don’t add any extra water (extra water, at this stage, will weaken your thinset because the polymer/latex that was in the powder at the beginning was already mixed into the thinset when you added the first water…if you add more water now, it’s just watering the thinset down and converting it to sand and water!)
- Your thinset is getting too dry on the floor. This is called "Open Time" (more info in the next section, below). If this is the case, make sure that you’re not troweling more thinset out than you can cover with tile within 5-10 minutes. (also remember, your floor can leech the water out of your thinset quickly, so one way to combat this is to lightly dampen your floor with a sponge before troweling the thinset down)
- You’re not applying enough pressure when pressing the tile into the thinset.
- The back of your tile is/was wet. This is an especially common issue with porcelain. Because porcelain absorbs almost no water, the water that was on the tile when cutting it needs to be dried off with a rag or towel after it's cut.
- Your floor or back of your tile wasn’t clean enough before troweling thinset. If there is any dust, sand, dirt, or any other contaminant on the floor or back of the tile (including oils or things of that nature), the thinset can have a hard time bonding the tile to the floor. To combat this, use the damp sponge to lightly dampen the area before troweling thinset on it.
- The first “time” is called Bucket Time (also called Bucket Life or Pot Life). This is the amount of time that your thinset will stay soft and useable while in your bucket. This time varies from thinset to thinset, but you can usually get at least a couple of hours out of it before it hardens, if you’ve mixed it properly (Note: because of the chemicals involved, white thinset tends to dry faster than gray).
- Note: Allowing the thinset to slake (in other words: to sit for a while) then mix it a second time before using it will usually make a fairly big difference in the total Bucket Life you have for your thinset. There are some thinsets that don't require this, but almost all of the time, you'll see this on the instructions on the bag.
- The second “time” is called Open Time. This is the amount of time that your thinset will stay soft and sticky (useable) on the floor. This also varies greatly with different thinsets, but it’s a good general idea to plan on about 10 minutes. So you will want to try to get tile set in your thinset, after you’ve troweled it out, within 10 minutes – don’t trowel out more than you think you can tile within that time (or the distance you can reach)…this usually amounts to less than 8 square feet. I would honestly recommend that you trowel enough for 1-2 tiles at a time, at least until you get the hang of this process.
- This may be a little difficult if this is your first project, but you want to try to move as quickly as possible, while still doing a good job. The reason for this is: tiles aren’t perfectly sized and shaped, so you will almost certainly have to push and pull rows and columns of tile a little bit. If you find that your tiles need to be moved 1/8” or 1/4”, it is very helpful to catch that while the thinset underneath is still wet enough to move them.
- One way to move several rows of tiles at a time, after they’ve been set, is to use a block of wood and hammer. Set the block of wood against the tile and lightly hit it with the hammer…this way, you spread the force of the hammer blow over the wood and not directly to the tile’s edge. If you do this, make sure to check your grout lines afterward and correct anything that's getting skewed. (Note: this is one BIG advantage of using the Tavy spacers over rubber spacers or leave-in spacers: since the Tavy spacers won't compress, they will maintain the same/correct spacing as you're moving several tiles at once! Some of the other spacers will bend, causing your lines to get twisted...this causes a big headache when you're installing and can be something you don't even notice until after everything is dry and you're walking on the tiles!!)
- If an area is going to be difficult to get into and out of (for example a “throne room” - a small room with just a toilet), it is often best to install as much as you can, then leave that room for the next day, after the thinset is dry and you can walk on your currently installed tiles, but make sure you're strategic about this and don't leave out tiles that are under doors or anything that will be extremely hard to install if the thinset under the tiles around that tile are not wet.
Once you reach this point, you should have all of your floor set!
CONGRATULATIONS!
How does it look??
After letting the thinset cure (dry), which usually means leaving it overnight (although could mean that you need to leave it for longer, depending on your specific thinset’s instructions), you are ready to move on to the Grouting phase!
One last note, here: most thinsets require the ambient temperature to be, at minimum, 55 degrees Fahrenheit for the full 12-24 hours to be able to properly cure. If the room doesn’t maintain at least 55 degrees, the thinset will take exponentially longer to dry!
Below are the exact tools that I use every day for setting tile,
so I can attest, to you, that they'll work well!
If you click this or any other product link on this site and make a purchase, you'll be supporting MyersFlooring.com with a small commission, which will have no additional cost to you, but we're immensely grateful for!
Grouting
I hope you’re impressed with yourself – you’ve done it! You’ve installed your tile floor yourself! There is really only 1 main step left to do in this whole process, so
Let's get to it!
- Note: Before you start grouting, you may want to apply a pre-grout sealer or "pre-release" (this isn't a special kind of sealer - any will work...it's purpose to keep the grout from staying into the tile and staining it). This is typically a good idea if you have natural stone (so that the grout doesn't stain the stone). Also, if you have a polished tile or a very porous tile, it would be a good idea to apply a sealer before grouting if you are doing a contrasting grout color, to avoid staining the tiles.
Choosing a color. Before we get started on the grout process, I want to just give you a little information and tips on how to choose the color for your grout. Obviously, this is a very subjective process and
In the end, it's really up to you - there isn't a wrong answer, here
but here’s what I find works best for me:
- 1If possible, use a grout chart or grout sticks from the manufacturer that you’re planning to get the grout. These are very much like a paint-swatch chart – you can lay down the sticks in or on your grout joints and see the difference, one vs another (many times, you can borrow a chart like this from the place you’re buying the grout). If you don’t have that option, you can take a tile or two to the store where you’re planning to buy the grout and check your options with their grout chart, there (this is my 2nd preference because it is most helpful to have the grout samples directly in the room where you’ve installed the tile – in your lighting that you have there, your reflections from paint, etc...colors can look very different in a gallery or a warehouse than they do in your room at home). 3rd choice is to take a printed pamphlet from the store, showing the grout colors, and choose one from that. (these printed pamphlets are often not very close to the true colors, so this is kind of a last resort, but if that's your only choice, that's what it'll have to be).

Choosing a grout color
- 2There are 2 options for grout color: complementing your tiles or contrasting your tiles. Most people choose a complementary color to their tiles, but I prefer at least little contrast, in most cases (my reason for this is that, with a completely complementing color, sometimes you can't even tell that it's tile - it can just look like a molded fiberglass surface - and all of your hard work won't show!!). Here are my opinions on when to use each (these are purely my opinions – your opinions and choice can and certain may differ – AND THAT’S OK!):
- Complementing color:
- A straight lay / grid pattern. You don’t have any special “custom-looking” pattern, so there’s not too much reason to want to see the outlines of the tiles.
- Natural stone. Normally, with natural stone, you want to see the variation, minerals, grain, and veins of the stones themselves, rather than being drawn to the pattern of the tile.
- A porcelain or ceramic with a strong pattern or texture in the tiles, themselves. As with natural stone, you’re wanting to see the actual tiles rather than the outlines of the tiles (the pattern of the install).
- If you want the floor to appear to be one solid surface.
- Contrasting color:
- An interesting or custom tile pattern. If you took a lot of time to install a fancy pattern, you don’t want it to be invisible and not be able to see your hard work!
- If the tiles are a solid color, you may or may not want contrasting grout, depending on the look you’re trying to achieve.
- Complementing color:

Contrasting grout color vs complementing

Grout: contrasting vs complementing color
- One final tip: I find it easier for me, and for my clients, to use the process of elimination, here. I will generally remove the grout sticks that are my "potentials" from the case and set them down, side-by-side in/around the grout joints. This way, it's much easier to remove the "wrong" ones, little by little, until you get down to your perfect choice!

Laying out grout sticks - process of elimination
These are the basic tools needed to grout.
- A grout float. I have a couple of different recommendations that will make your grouting go more smoothly, but you can also use a cheap/discount float and that will work if this is your first tile job and you don't know if you'll be doing more.
- Either two 5-gallon buckets and several sponges or a grout cleaning kit.
- Note: If this is your first tile project and you don’t plan to do more, it will probably be hard to justify the cost of a grout cleaning kit. However, grout cleaning kits are EXTREMELY helpful in being able to clean the grout quickly and leave the grout joints more full than with typical sponges. Also, the sponges that come with the grout cleaning kits can be purchased separately and they are EXCELLENT sponges (much better than regular sponges). You might ask, “Really? How much better can one sponge be than another?" The answer: A LOT. These specialty sponges have cuts in them, which basically makes them more like 20 or 40 sponges in one, so they clean VERY well, very quickly, and very efficiently. Another big plus to using a grout cleaning kit is that you don’t have to have your hands in the water very much – you use a handle on the grout sponge, which leaves your hands out of the water most of the time! (hands + lots of water = cracks in skin…really painful cracks)
- A pair of tight-fitting gloves (latex, nitrile, or vinyl).

Squeasy grout system

Specialty sponges - cuts
These aren't too many materials that you need, at this point.
- 1Grout. There are a lot of different grout options, but they fall into 3 main categories:
In the past few years, many grout manufacturers have discontinued the older, traditional “sanded” and “non-sanded” grouts in favor for what they’re calling “power grout”. Power grouts usually have a sealer in them, already (so don’t need to be sealed), and they’re very often rapid-set grouts. This means that you won’t be able to do a huge area at a time before cleaning it. These power grouts also dry extremely hard and you can use the same grout for grout joints all the way from 1/32" to 1/2"!
There are a number of different premixed grouts. These have some advantages and some disadvantages.
I find them quite difficult to install and to clean (they dry EXTREMELY fast, so you have to spread a little bit, then clean - generally within 5-10 minutes), but they also usually dry more flexible, so can withstand expansion and contraction movement, so many times, you don't have to use caulk when using these.
They tend to be quite a bit more expensive than powder grout but, on the other hand, they stay soft, in their bucket, so you can use some, close the bucket, use some another time, etc...so you have little waste.

Pre-mixed grout slumped in the joint
One of my major gripes is that they tend to "slump" or sink in the grout joints, so you may have to extra touch-ups after they dry. However, they are color consistent, so you don't have to worry about having different colors due to grouting at different times. Plus, you obviously don't have to get out the mixer, so they take less preparation to get started!
If you choose to use a pre-mixed grout, just make sure to follow the manufacturer's instructions closely!
")
Pre-mixed grout (Mapei FlexCQ)
Epoxy grouts dry extremely hard (harder than the tile, in most cases) and are pretty much a "bulletproof" solution. They're often used in commercial applications and are virtually maintenance-free. However, both the resin and the hardener are highly toxic, so you have to take special precautions when grouting with epoxy.
I used to install a lot of epoxy grout, but then, my skin/body developed an intolerance to it (every person will develop this intolerance/sensitivity at some point, since it's a toxic material) and now, if it touches my skin, it will eat away the skin and even if I smell the fumes, I will break out in itchy rashes on parts of my body and will usually take about 2 weeks to recover from. So I don't install epoxy grout at all, anymore (no matter the price tag). I STRONGLY recommend that you DON'T use epoxy on a first project!

Epoxy grout eating my skin

Epoxy grout effects on my skin
- 2Caulking (maybe). Every major manufacturer of grout has matching caulking that you can get and should use. Caulking is very important when tiling walls, but you only need it for a floor if you have something that you're tiling up to, like a bathtub or a different floor, like wood. You don't need to put caulking around the perimeter of the room - that joint needs to stay clear of material. In addition, part of the purpose of baseboard is to cover that expansion joint around the room. These tubes of caulking aren't typically very expensive and they allow for the expansion and contraction between the two surfaces (your tile and the other surface).
- 3Plenty of clean water!
Ok, now we’re going to
start grouting your new floor!
All right, ladies and gentlemen, we're about to do the final major step in installing your floor!
- 1Prep the floor: The first thing you’ll want to do is clean up your newly tiled floor.
- 2Mix your grout. I’m assuming that you’re using grout in a bag, here. (if you're using a pre-mixed grout, you won't be mixing the grout, obviously - you can stir the mixture a bit with your float and be ready to go)
- 1Use a small bucket for this (I use 1 gallon buckets). You don’t want to mix too much, especially your first time.
- 2Pour in a small amount of clean water (I’d recommend about one cup of water or less, then pour in a small amount of grout powder, then mix. Don’t mix too fast – if you whip the mixture, you’ll introduce extra air bubbles into the grout that will weaken it and cause it to be more difficult to work with, so try to keep your mixing speed under 300rpm (low speed on your drill or mixer). Add more water or more powder until your mixture reaches about a peanut butter consistency and you’ve mixed 3-4” worth in your bucket.
- Cold water: with some grouts, it can be very helpful to mix with cold water (even ICE WATER, in some cases - especially in the summer and in hot climates). Overall, cold water will usually help to slow the drying of the grout and warm/hot water will speed up the drying...so I would recommend that you use cold water, at least until you get used to this process.
- 3Let the grout slake in the bucket for at least 10 minutes (again, this time varies from brand to brand, so check the instructions on the bag), then mix it again in the same way, but don’t add any more water at this step.
Note: even if you already know the instructions, it’s worth double-checking the bag because manufacturers will sometimes change their instructions. For example, Mapei modified their instructions on their Ultracolor FA grout and took out the step for letting it slake before installing after I’d been using that grout for a couple of years…I would’ve never known this if I hadn’t checked the bag!
- 3Take a damp sponge (not wet enough to leave water in the grout joints, just slightly damp) and run it over the surface of the tiles that you’re going to be grouting. This helps the grout be easier to remove from the surfaces of the tiles.
- 4Smearing Step: Take some of the grout from the bucket, using your float, and start spreading in the corner of your floor. To do this, you will follow the steps, below.
Note: if you’re using a pre-mixed grout, follow the instructions closely! Many pre-mixed and ready-to-use grouts harden EXTREMELY fast and can easily catch you off guard, so follow their recommendations on how much to spread out at a time!)
- Hold your float at a low-degree angle (maybe 5 or 10 degrees) and spread the grout over the joints in the tile.
- Use the edges of your float to force the grout into the joints. Run your float at a diagonal angle to the grout lines – if you pull your float perpendicular to your grout lines, you’ll find that you pull the grout out when your float catches on the joint.
- Holding your float at an almost 90 degree angle, scrape the excess grout off of the tile – again, pulling your grout float at a diagonal angle to the grout joints (not perpendicular to the joints or your float will fall into the joints and pull grout out).

Grout smeared
- 5Wait for grout to set. Check the instructions on the bag to see how long the manufacturer recommends before you start cleaning the grout off the tiles (normally, this will be about 10-15 minutes with power grouts, 15-30 minutes with standard grouts, 5-10 minutes with pre-mixed grouts…but the amount of time varies largely due to temperature, air flow, and how absorbent your tile is). A good test, to see if the grout is ready to be washed or not, is to touch your finger across one of the grout lines. If the finger comes up with grout on it, it’s still too wet to start cleaning; if the finger comes up without grout on it, you’re ready to start cleaning.

Mapei FlexCQ Instructions
- 6Wash Step: Once the grout is set, you’re ready for the “Wash” phase, which means that you’ll take a sponge, dampen it in water, and lightly rub the surface of the floor using broad strokes. Make sure to run the sponge diagonally over the grout joints to make sure you aren’t pulling grout out of the joints. You don’t need much force in this step – making a couple of light passes over the tile will do a better job of loosening the grout than applying too much pressure, because if you press too much, you’re likely to remove grout from the joints.

Grout washed
- Wash all of the area that you spread grout on. You should see that this will leave a foamy layer on the surface of the tiles and grout joints.
- Note: You’ll need to use water during this phase, but try not to use excessive amounts of water or to rub the tiles too hard. If you use too much water or rubbing, you could pull the color out of your grout and/or pull the grout out of the joints. Timing is important in the Wash phase because you want to make sure to break the bond of the grout to the tiles before it hardens too much, but not so early that you’re pulling the grout out of the joints.
- 7Rinse Step: When you’ve finish washing all of the area that you’ve grouted, look at the area where you started washing and see if it is starting to dry on the tile. If it’s not, you can mix up more grout and continue smearing a new area, then come back to the rinsing after that (this timeframe also varies quite a bit, depending on the temperature and air flow, absorbency of the tile, etc). Once you see that the tops of the tiles are fairly dry, you’ll be close to ready to start rinsing. As in step #5, you can test the grout's dryness by placing a finger across a grout line; if the finger comes away dry, you're ready to go, and if some grout transfers to the finger, you'll want to wait a bit more.
- Note: Timing is not nearly as important in the Rinse phase as it is in the Wash phase…breaking that original bond in the Wash phase helps to keep it from getting extra hard on you, up front. So when you’re rinsing, the grout shouldn’t be too difficult to remove (unless you've left it to dry way too long) because the strongest bond has already been broken – you’re just removing the excess, now.
- 1To rinse, dampen your sponge and squeeze out all of the water from it, then lightly drag the sponge across your tile and grout line, using the flattest side of the sponge – again, at a diagonal angle. With this 1 swipe, you will probably be able to clean about 1 tile and a couple of it’s surrounding grout joints.
- 2Flip the sponge over to the clean side and lightly drag the sponge across another area in the same manner.
- Tip: Don’t try to go too far with your sponge or do more than a couple of swipes because you’ll find that you’re just smearing more of the dirty grout water back onto the tile. It’s best to just use the 2 biggest/flattest sides, then clean the sponge again before continuing. If you do this and keep clean, you may not have to do further rinses after this first.
- 3Continue this process until you’ve rinsed off all of the tiles. If your grout water starts getting too dirty, you’ll need to throw it out and get fresh water.
- Tip: If you're using pre-mixed grout, you'll have to change water more often. When your water gets foamy, you'll know that it will need to be swapped for clean water soon!

Pre-mixed grout foamy water
- 4If you're using regular sponges and buckets, you'll probably have to do at least 2 rinses to get the tile relatively clean. This is another HUGE benefit of a grouting cleaning system. I almost never have to do 2 rinses when using my Squeasy or Barwalt grout cleaning kits - because of the cuts in the sponges and how the systems work, I generally have a very clean result after the first rinse.
- Example. Below is an example of how well the grout cleaning systems (and the slit-bottom sponges) work. Pebbles and river rocks are notoriously difficult to get rinse. Because there is so much more grout between the rocks than between typical tiles, it can be very hard to get the surfaces clean without pulling all of the grout out of the joints! The grout cleaning systems aren't perfect, of course, but they do help a TON to make the grouting process easier, faster, and produce a better end result! (my preferred system is the Squeasy Grout Cleaning Kit)

Example of grout cleaning system on pebbles - before

Example of grout cleaning system on pebbles - cleaning

Example of grout cleaning system on pebbles - after

Pebbles on shower floor

Rinsing the grout
- Final Tip: Many times, it's helpful to do a final rinse with vinegar and clean water. Vinegar will not damage the grout, but is an excellent cleaner and can leave your final tile much cleaner than with water, alone.
Once you’ve finished rinsing…..wait for it…..
YOU'RE DONE!!
Congratulations, you have officially tiled and grouted your tile floor by yourself!
It's now time to step back and look at your finished product!
Of course, you still need to put the room back together (toilet on, baseboards on, etc), but you have officially tiled this floor yourself!
So, what is your answer, now, to that initial question of
Can I install a tile floor myself!?
Below are the exact tools that I use every day for grouting tile,
so I can attest, to you, that they'll work well!
If you click this or any other product link on this site and make a purchase, you'll be supporting MyersFlooring.com with a small commission, which will have no additional cost to you, but we're immensely grateful for!
Sealing
The primary thing that I want to tell you about sealing is that you shouldn't use a sponge to apply sealer. The reason for this is that the carrier that helps to move the sealer into the tile, stone, or grout is water. If you use a sponge, it will absorb the sealer and you will simply be wiping water onto the surface... So instead, use a terry cloth to apply the sealer. In addition, you can use a spray bottle and spray a coat onto the surface. Whatever way you choose, if any sealer pools on the surface and doesn't absorb in, you should remove that excess with a dry cloth to prevent it from drying on the surface (if it does dry, it will not harden - it will feel more like a tape adhesive consistency...just sticky). If you do have some sealer that has pooled and dried, you can typically apply more sealer onto that area and it will re-emulsify the sealer and you should be able to remove that excess.
So, now that you've finished with installing this floor, you may be asking, "Do I need to seal the tile?" or "Do I need to seal the grout?" or "What is the purpose of sealing, anyway!?"
Well, let me see if I can shed some light on those questions.
Contrary to popular belief, the purpose of sealing is not to prevent water from getting into your tile and/or grout. Unfortunately, because of the nature of liquids, if something sits on the surface for long enough, it will almost always manage to get through, eventually…and this holds true for sealers, as well. But the real purpose of sealing is to prevent staining agents, like red wine, grape juice, and the Oh-So-Dangerous-Oils from STAINING your tiles or grout (just like with your furniture or clothes!). So, because of this, the real function of sealers is to give you enough time to get that staining agent off the tile and/or grout to prevent it from working its way in and leaving a permanent stain!


Some last pieces of information/suggestions:
- Since the purpose of a sealer isn’t really to prevent water from entering the tile or grout, but to help prevent staining, there are really only a couple of places where it’s particularly important, in my opinion. Those would be places that are prone to be splashed or splattered with staining agents: kitchen backsplash (in particular, behind the stovetop) is the biggest one. Also, around a kids’ bathroom toilet area is a good place to have sealed. It can be helpful in keeping showers and tub surrounds clean, as well, but not nearly as important as major stain-prone areas.
- Again, you also have to be careful with cleaners that will be used on a consistent basis. The most recommended cleaners for grout are pH-neutral cleaners (like a cleaner specifically designed for use on natural stone or sealers). Vinegar and water is a pretty safe cleaner, in general, as well.
There aren't really any tools that I use every day for sealing tile and grout,
so here are our recommended sealers!
If you click this or any other product link on this site and make a purchase, you'll be supporting MyersFlooring.com with a small commission, which will have no additional cost to you, but we're immensely grateful for!
Summary/Reference
In this section, I’ll summarize the steps involved in this article (keeping them as short as possible!) for those of you who are skipping to the end (like I often do!). They're also linked, so you can jump to any of these sections.
- Can I install a tile floor myself?
- Is it worth it for me to do the tile job myself?
- So, who's writing this article?
- Recommended tile & pattern to install: 12x12 or 13x13 porcelain on 1/2 bond/offset
- Measuring rules: round up to next 6", order 10% extra
- How to do the calculations
- Recommendation: use a dedicated tile store
- Buy Planning/Measuring Tools
- Check for mold/mildew/asbestos
- Safety: Wear gloves, kneepads, safety glasses, and a mask
- How to demo tile, carpet, wood, or vinyl
- Buy Demo Tools
- How to choose between concrete board and uncoupling membrane
- Cracks: types and what to do
- Installing concrete board
- Installing uncoupling membrane
- Undercutting door jambs and casings
- Buy Underlayment Tools
- Tiling tools and how to determine what you need
- Materials needed
- Check your flatness / level floor
- Instructions to set the tile
- Buy Tools for Setting Tile
Follow us here:
Click here to share!
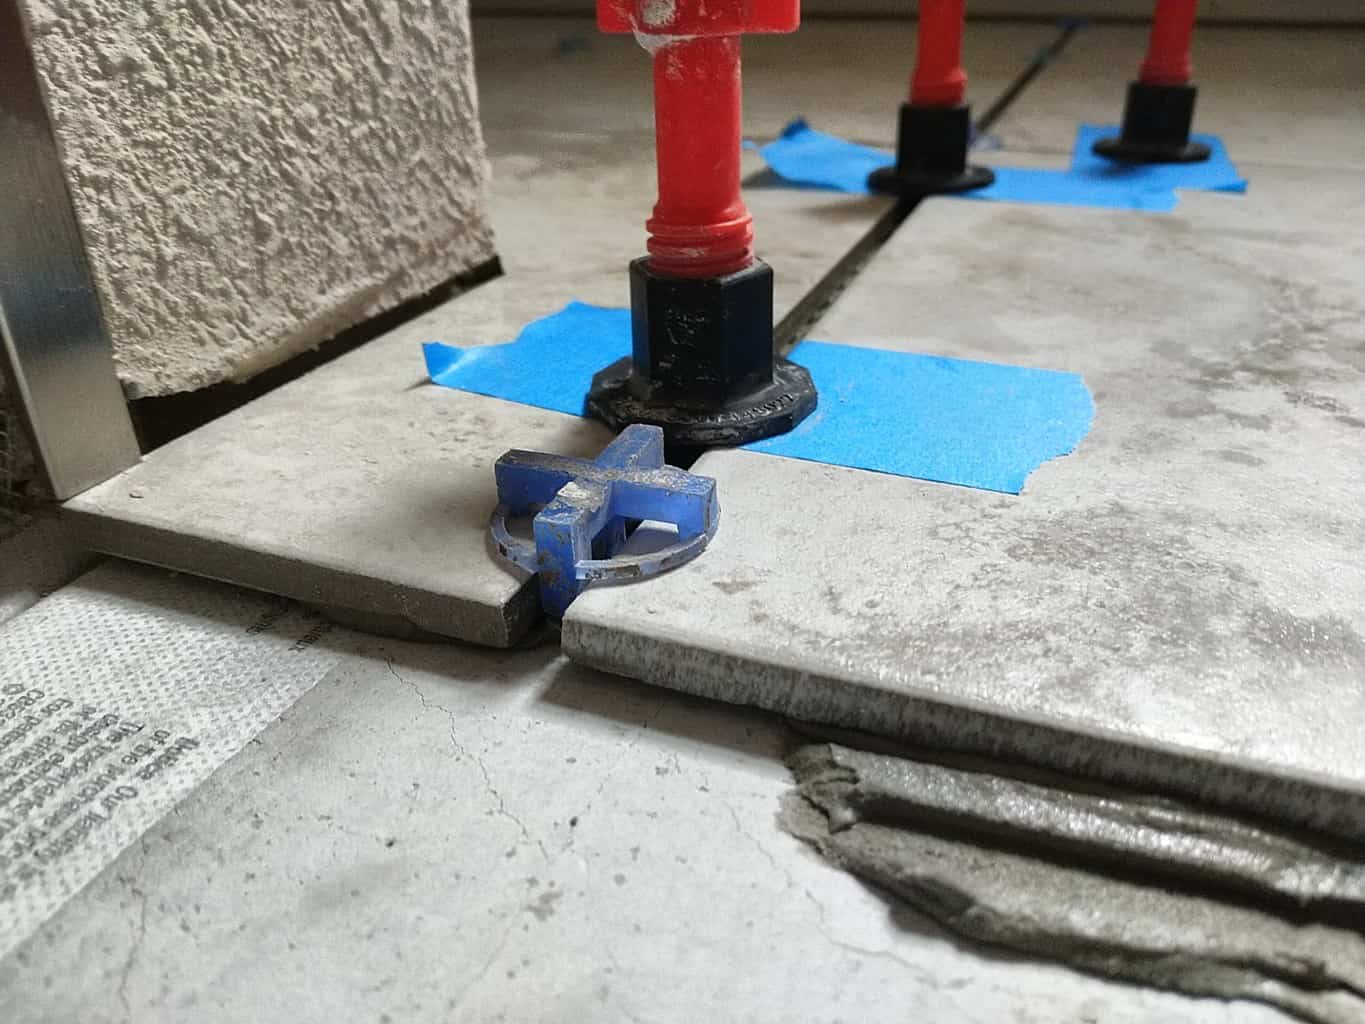
Hi there it’s me, I am also visiting this website daily,
this website is genuinely good and the visitors are in fact
sharing pleasant thoughts.
Thank you for your comment and for the repeat visits! I’m glad to hear that you’re enjoying he website!
Very good post.Really looking forward to read more. Great.
My website:
Thank you – I appreciate that!
Muchos Gracias for your article.Really thank you! Cool.
My website:
You’re very welcome – I’m glad to hear that it’s been useful to you. Thanks for visiting and reading!
Thank you ever so for you blog. Really looking forward to read more.
My website:
You’re very welcome – thank you for visiting and for your comment! I’m glad that you’ve found my information helpful.
Thank you ever so for you blog. Really looking forward to read more.
My website:
You’re very welcome – thank you for reading and commenting!
Hey, are you having issues with your hosting? I needed to refresh the page about million times to get the page to load. Just saying
I’m sorry to hear that, Armando (and sorry for the slow response). I haven’t been told of any issues, lately – I do get a notice that my website goes down for short periods of time every once in a while, but those are usually very infrequent. I do know that this article, in particular, is a HUGE one and can bog down on loads, sometimes. I’ve tried to optimize it as much as possible. In any case, thank you very much for letting me know – I’ll look into it further!
Very good post.Really looking forward to read more. Great.
Thank you for the comment – I’m glad you enjoyed the post!
Appreciate you sharing, great blog.Much thanks again. Awesome.
You’re certainly welcome. Thanks much for the comment – I appreciate it!
Hi there from Texas! I’m bored at work so I decided to check out your site on my free time during lunch break. I love the info you provide here. Anyhow, wonderful post!
Thanks for the comment and kind words. I appreciate it!
It helped when you said that having a sizing pattern for tile installation could help with proper alignment. After moving to our current area, my wife told me she was planning to replace the floor tiles in our living room and replace with tiles for a more elegant function and appearance. She asked if I had any idea what would be the best option to consider. Thanks to this informative floor tile guide article for the best planning approach. I'll consult a trusted flooring company as they have a large selection of wall and floor tiles.
I’m glad to be of help, Steve, and I hope your project goes well!
Hi, unfortunately, I faced challenges with the slow loading speed of your website, leading to frustration. I recommend a service, linked below, that I’ve used personally to significantly improve my website speed. I really love your website…Optimize now
Thanks for the comment, Jeff. That’s always something I’m battling. I’ll look into the link that you shared.
This article on "Ultimate Guide To Installing A Tile Floor" is an excellent resource for anyone looking to tackle a tile flooring project. The step-by-step instructions are clear and easy to follow, making the installation process seem less daunting. The accompanying images provide a helpful visual aid, enhancing the overall comprehension. Moreover, the article offers practical tips and tricks, ensuring a successful tile floor installation. It's a must-read for both beginners and experienced DIY enthusiasts, making the task more manageable and yielding professional results. Highly recommended!
Thanks again, Alice. I appreciate it and am glad you enjoyed reading through it!
This article on installing a tile floor is an invaluable resource for DIY enthusiasts and beginners alike. The step-by-step instructions are clear and easy to follow, making the tile installation process accessible to anyone. The inclusion of practical tips and tricks ensures a successful outcome, and the author's expertise shines through in the detailed explanations. Whether you're looking to spruce up your home or embark on a new project, this ultimate guide is a must-read. Highly recommended for its simplicity and effectiveness.
Thank you much for your comment, Alice. I appreciate your kind words!
"Your 'Ultimate Guide To Installing a Tile Floor' is an absolute gem! It's a comprehensive treasure trove of information that takes the complexity out of tile installation. From start to finish, your detailed insights and step-by-step instructions make this daunting task seem effortlessly achievable. A must-visit resource for anyone looking to elevate their home's aesthetic. Bravo!"
Thank you much for your comment, Elsie – I put more than 200 hours into putting this article together, so I’m very happy to hear that you found it useful and well put-together! I appreciate it!
I am now not sure the place you are getting your info, however good topic. I must spend a while studying more or understanding more. Thank you for wonderful information I used to be searching for this info for my mission.
I’m glad you’ve been enjoying the information and articles. In answer to the question of where I’m getting my info, it is from daily experience – this is work that I’ve done every day for over 10 years, so I’ve seen many things that have worked and many that have not worked.
Hi there, just became alert to your blog through web search, and found that it’s truly informative. I’m going to watch out for updates. I’ll be grateful if you continue this in future. A lot of people will be benefited from your writing. Cheers!
Thanks for the comment, Omar. I’m glad to hear that the articles have been helpful! Hopefully, I’ll be able to write some more content soon!
Really appreciate you sharing this article post.Really thank you! Awesome.
You’re welcome! I’m glad that you enjoyed it and it helped you out.
Fantastic guide, thanks so much for putting this together!! It's made my tile install go much more smoothly as a first time DIY'er.
Thought I'd mention that for the tile setting process, I found this Youtube video to be very helpful at increasing the thinset adhesion and would recommend everyone watch it. I found the glass plate demonstration to be particularly useful:
Trowel and Error – How to Set Tile the Right Way
https://youtu.be/Way5bMh-eYg
It also validates your explanation as to why you should trowel the thinset all in one direction.
Thanks for the comment, Teddy – I’m very glad to hear that my Guide was helpful for your project! Thanks for posting the link to that video, as well; it is considered to be one of the most important videos out there for setting tile and is made by the NTCA, who are responsible for creating the standards for the tile-setting industry. You’re 100% correct in that everyone should watch it (including seasoned professionals). Have a great day!
I do not know whether it’s just me or if everyone else encountering
issues with your site. It appears like some of the written text on your posts are running off the screen. Can somebody else please comment and let
me know if this is happening to them as well?
This may be a issue with my web browser because I’ve had this happen previously.
Kudos
Thank you for letting me know! I haven’t had any feedback about this from anyone else, but it certainly could be an issue. Could you tell me what phone you are using (if using a phone to view) or what resolution and browser you are using (if using a computer or tablet) and I’ll see if I can duplicate it?
Woah! I’m really loving the template/theme of
this blog. It’s simple, yet effective. A lot of times
it’s hard to get that “perfect balance” between user friendliness and visual appeal.
I must say that you’ve done a awesome job with this.
In addition, the blog loads very fast for me on Internet explorer.
Excellent Blog!
Thank you very much for your comment! I’m glad to hear that you’ve been enjoying the site! I’m certainly no web designer and it’s been quite a lot of work to put this site together & maintain it (particularly, while running my tile business), and it’s encouraging to hear comments like yours. Your page load speed note, too, is something I really appreciate because I’ve spent a lot of time trying to get it optimized to load quickly, but have always been concerned about it being slow for people. Thank you, again!
Thanks for talking about tiles with door jams. I want a tile set that is completely flush with each other. I'll have to consider getting a contractor to put in the replacements.
You’re certainly welcome, Tex. I’m glad you were able to get some good from the article. It’s usually possible and fairly simple to get new tiles to come out flush with other tiles or hardwood – it all depends on the thicknesses of the existing floor and the new one that you want to put in. Vinyl floors, on the other hand (LVP, LVT, etc), are almost impossible to get new tile flush with because they are far too thin. A decent tile contractor in your area should be able to pretty easily achieve what you’re looking for.
Thanks again – have a good one!
Good site you’ve got here.. It’s hard to find quality writing like yours these days.
I honestly appreciate people like you! Take care!!
Thank you, clarissadees. I’m glad to hear that you’ve enoyed it! I’m hoping to free up some time to be able to write some additional content soon.
Great Informative article!
I have a question which saw is better for <a href="https://sawsummary.com/do-you-cut-ceramic-tile-face-up-or-down/">cutting ceramic tile?</a>
Thank you, John. I appreciate the feedback! To answer your question, almost every tile pro that I know uses the Dewalt D24000 10-inch wet saw.
Asking questions are truly pleasant thing if you
are not understanding something completely, however this paragraph offers
pleasant understanding even.
The style that you write make it really comfortable to read. And the template you use, wow. It is a really good combination. And I am wondering whats the name of the design you use?
Thank you for the comment, xmc.pl – I’m glad to hear that you enjoyed the article!
I actually made the template and the whole theme from scratch using a set of WordPress plugins called Thrive Suite…and I maintain the site with that same suite. I’m certainly no web designer, but these plugins are incredibly powerful, but simple to use – I’ve been very, VERY impressed with them! I you’d like to check them out, here’s the link for more information:
https://thrivethemes.com/affiliates/ref.php?id=10854
Hey! Quick question that’s entirely off topic. Do you know how to make your site mobile friendly? My blog looks weird when viewing from my apple iphone 13. I’m trying to find a template or plugin that might be able to correct this issue. If you have any recommendations, please share.
Hello, marcs! I will send you a direct email with this information, as well:
Honestly, the plugin that I have used since the very beginning, in creating, editing, and maintaining this site, has been extremely helpful. It’s called Thrive Architect and Thrive Suite – the link to their website is: https://thrivethemes.com/affiliates/ref.php?id=10854
It has a mode that allows you to view exactly what the blog or website will look like on different screens and formats (mobile, computer, and tablet). It’s incredibly powerful, but also pretty user friendly and is completely visual editing (you don’t code or use blocks or anything…you change exactly what you see).
I hope that’s helpful!
Really enjoyed this article post. Thanks Again. Want more. Indira Shaine Tomkin
Thank you, Indira! I’m glad to hear that you liked it! We try to write new content as frequently as possible. If you’d like to be notified when we write/post new articles, feel free to sign up for the notifications at the bottom of any page (or feel free to check back however often you like!).
Hi there colleagues, pleasant piece of writing and good arguments commented at this place, I am really enjoying by these. Fionnula Vernen Pelson
Thank you, Fionnula, I appreciate it! If you’d like to be updated when we write and post new articles, feel free to sign up at the bottom of any page.
Hi there very nice blog!! Guy .. Beautiful .. Amazing .. Merrile Court Recor
Thank you, Merrile! I’m glad you enjoy it!
Bu site üzerinde genel olarak herkesin gereksinimlerini karşılayacak türden birbirinden farklı yapıda takipçi paketleri seçenekleri yer alıyor
Hi there, its pleasant article regarding media print, we all understand media is a impressive source of data. Corissa Doyle Delfine
I really enjoy the blog post. Really looking forward to read more. Fantastic. Maurita Joel Judi
Thank you, Maurita! I’m glad you liked it and hope the information is helpful to you!
I think this is a real great blog article. Really looking forward to read more. Much obliged. Elfrieda Rory Chemarin
Thank you much, Elfrieda! I’m glad you liked it!